Introduction to Gridpay
Gridpay has been designed so you can perform every action directly through the Control Panel. Everything in blue is clickable and will link you directly to the relevant document, invoice, payment, payout, contract, customer etc. Gridpay was designed to give you a complete oversight of your business, in just a few clicks.
The control panel is divided up into three sections.
If using on a mobile device the instructions remain the same but the control buttons are located under the 3 stripes on the top right of each page.
On the left are the menu buttons. Here you can easily begin any action that you wish to perform on Gridpay. You can find out more details on each action by selecting the correct topic in the topics menu on this page.
On the right is the notifications and message panel. Here you will receive real time updates whenever something happens on your account. You can chat directly with the customer by clicking on their name. You can link directly to the invoice or contract by clicking signed or payment.
The middle section is where all the action happens. We encourage you to read the individual topics on each action so that you get a good understanding on how it all works. It´s easy to learn and once you´re familiar you´ll wonder how you worked without it.
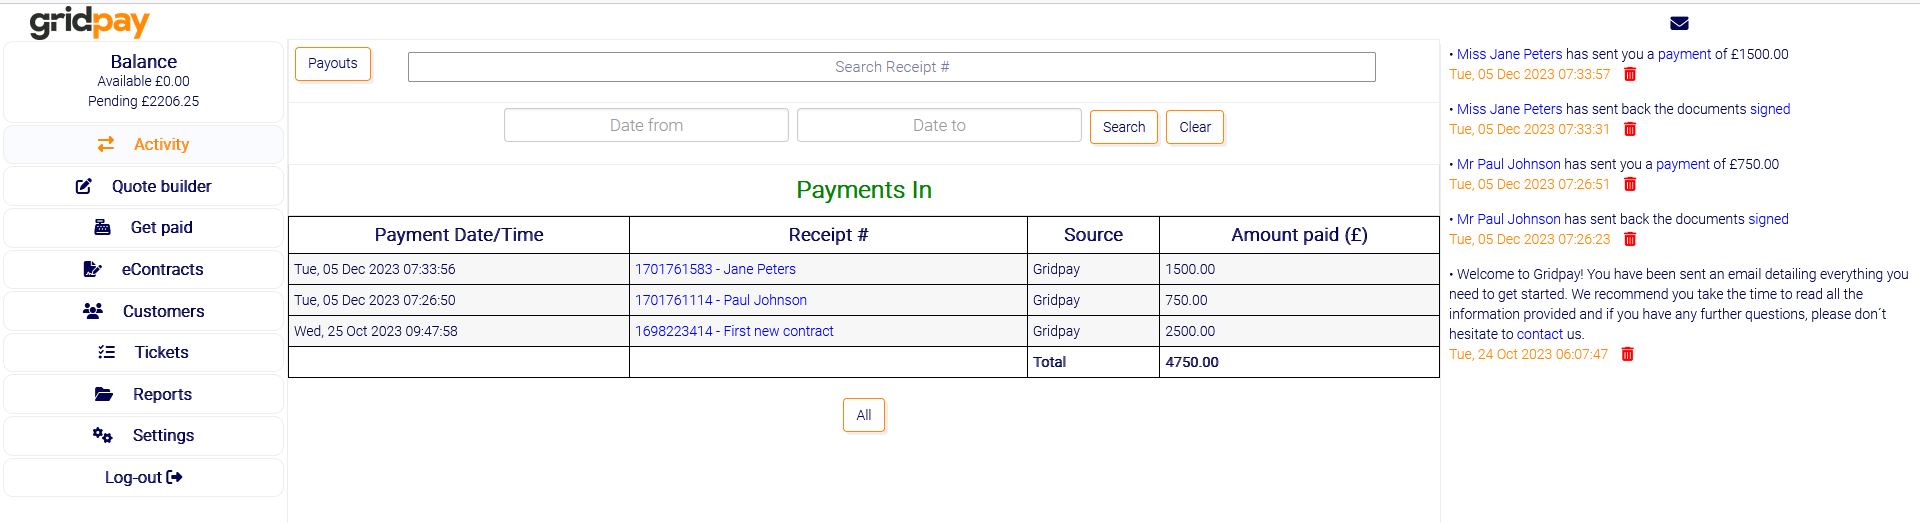
To view your payments and payouts activity, click on the Activity button. You will be displayed a table that contains details about every transaction you have processed through Gridpay and all the transactions you have marked as paid by another payment method. Gridpay logs all these details for you ‘on the fly’, To make it easy to keep track of all your incoming payments.
Every transaction you receive through Gridpay will generate a receipt which is automatically emailed to the customer. Even when you mark a transaction as paid by another method, we log the transaction and will send the customer a receipt. You can search for receipts, by receipt number, by simply typing in the search bar at the top.

Clicking on an invoice number will bring up a new window with more details about the transaction (such as fees or customer details). You can also link directly to the invoice or contract by clicking invoice or contract at the bottom.
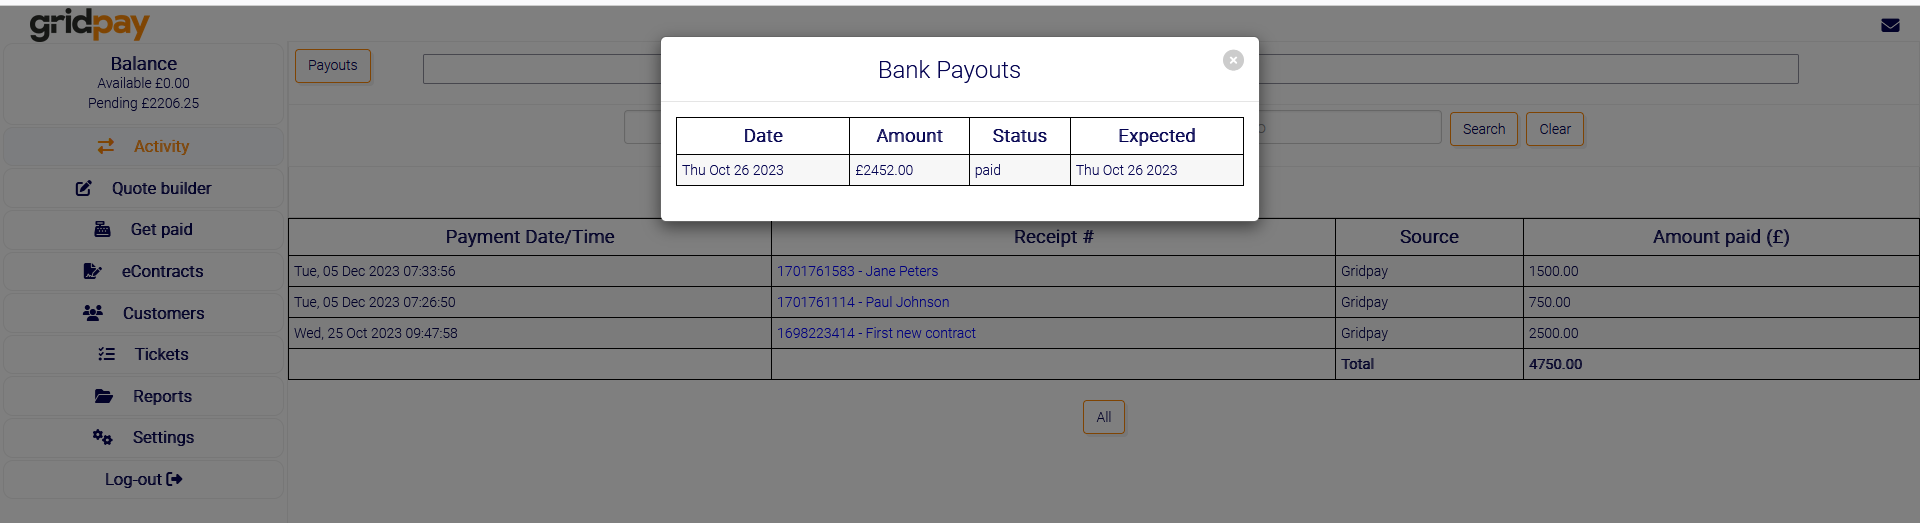
If you click on the Payouts button near the top left of the screen, this will give details on past and current Gridpay payouts. It will show the amount, the date the payout was initiated and the current status. In transit means it’s on the way to your bank account and will be there within 3-5 business days from the initiation date. Paid means it should be in your bank. Payouts from us will show on your bank statement as Gridpay LTD.
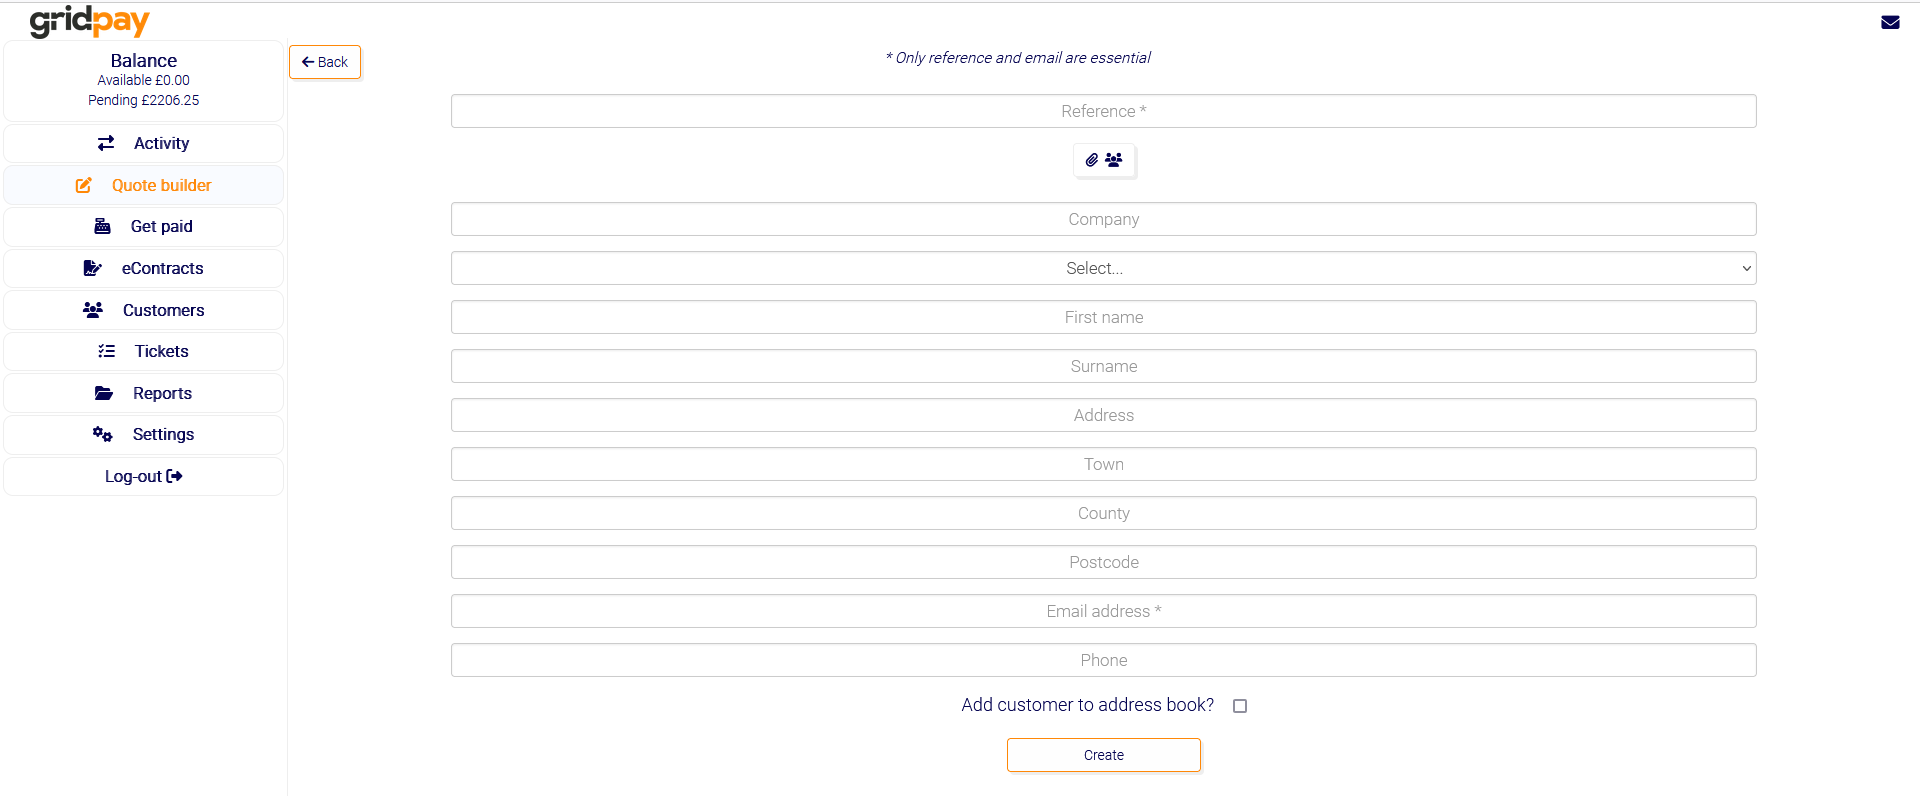
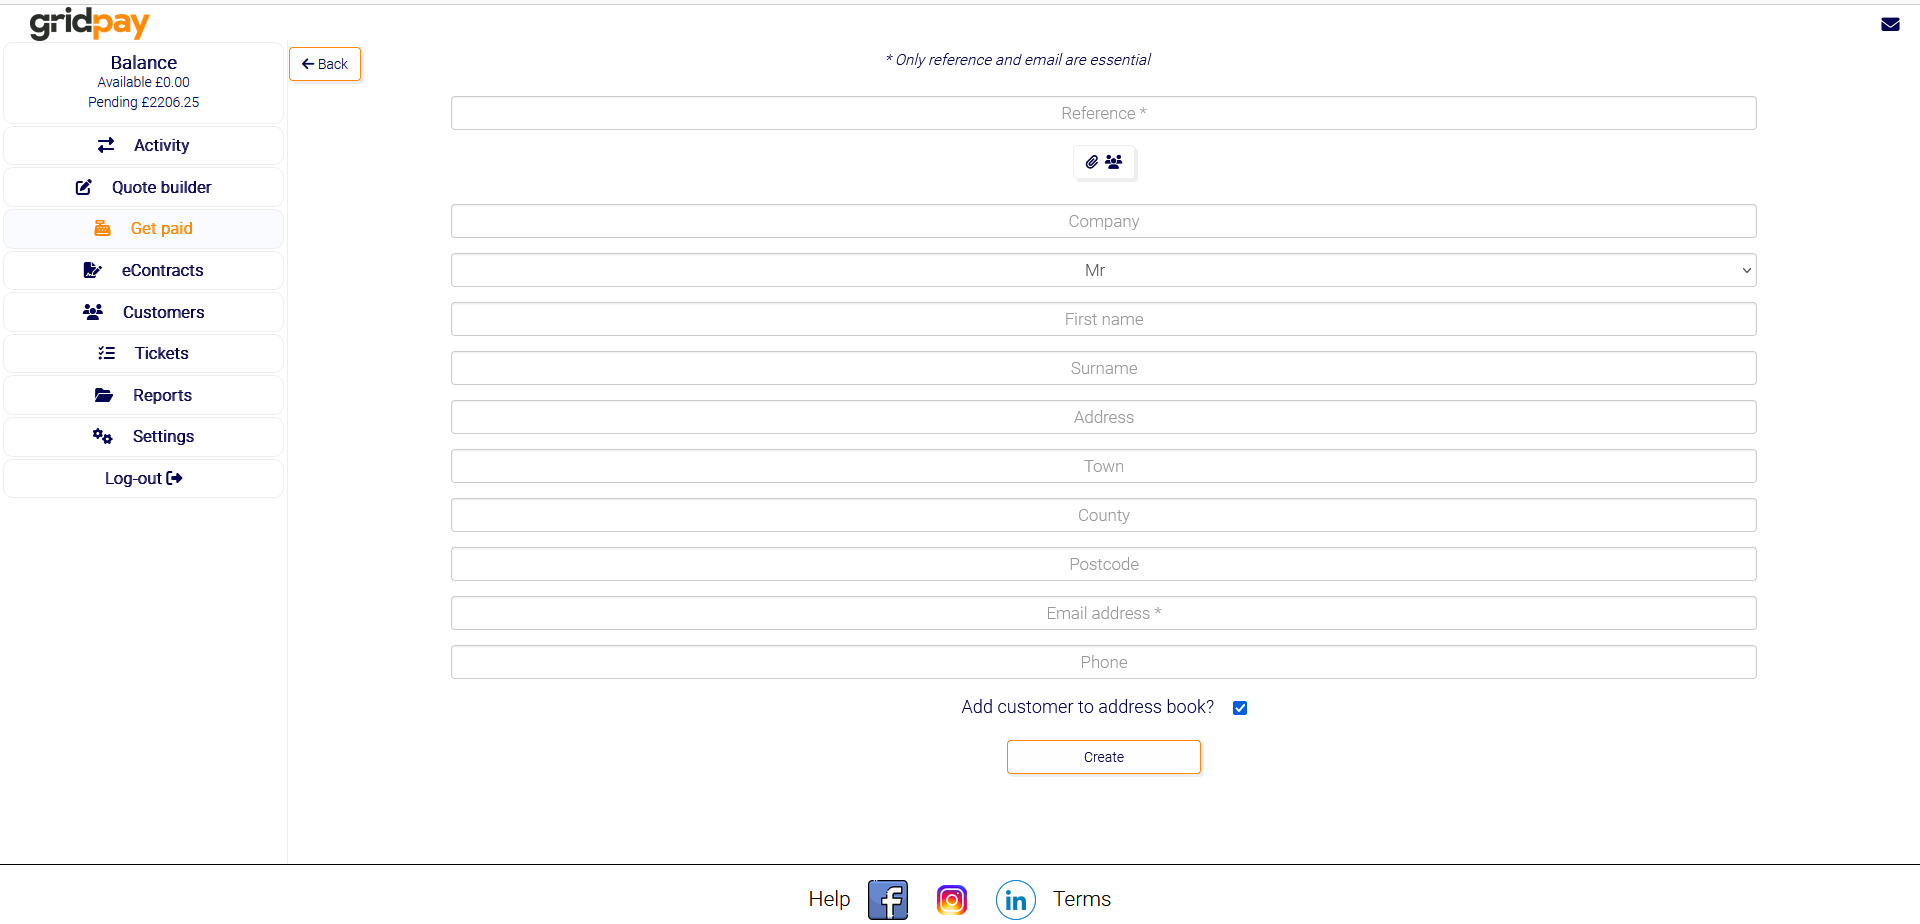
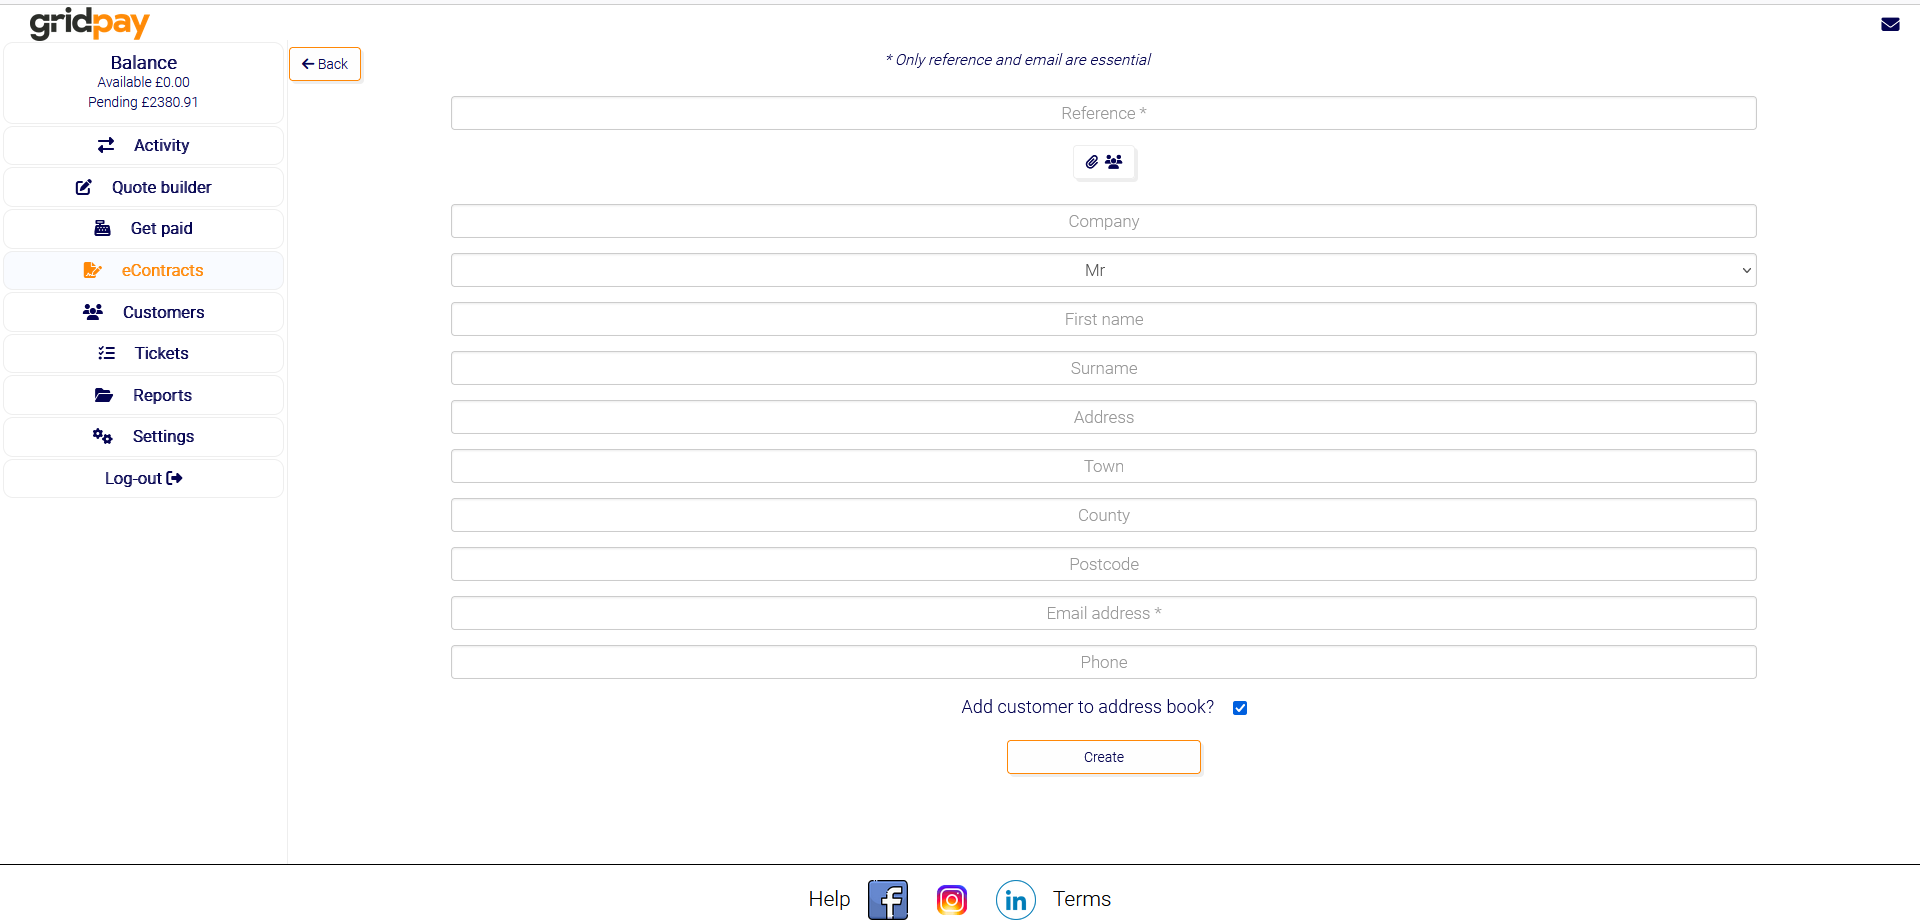
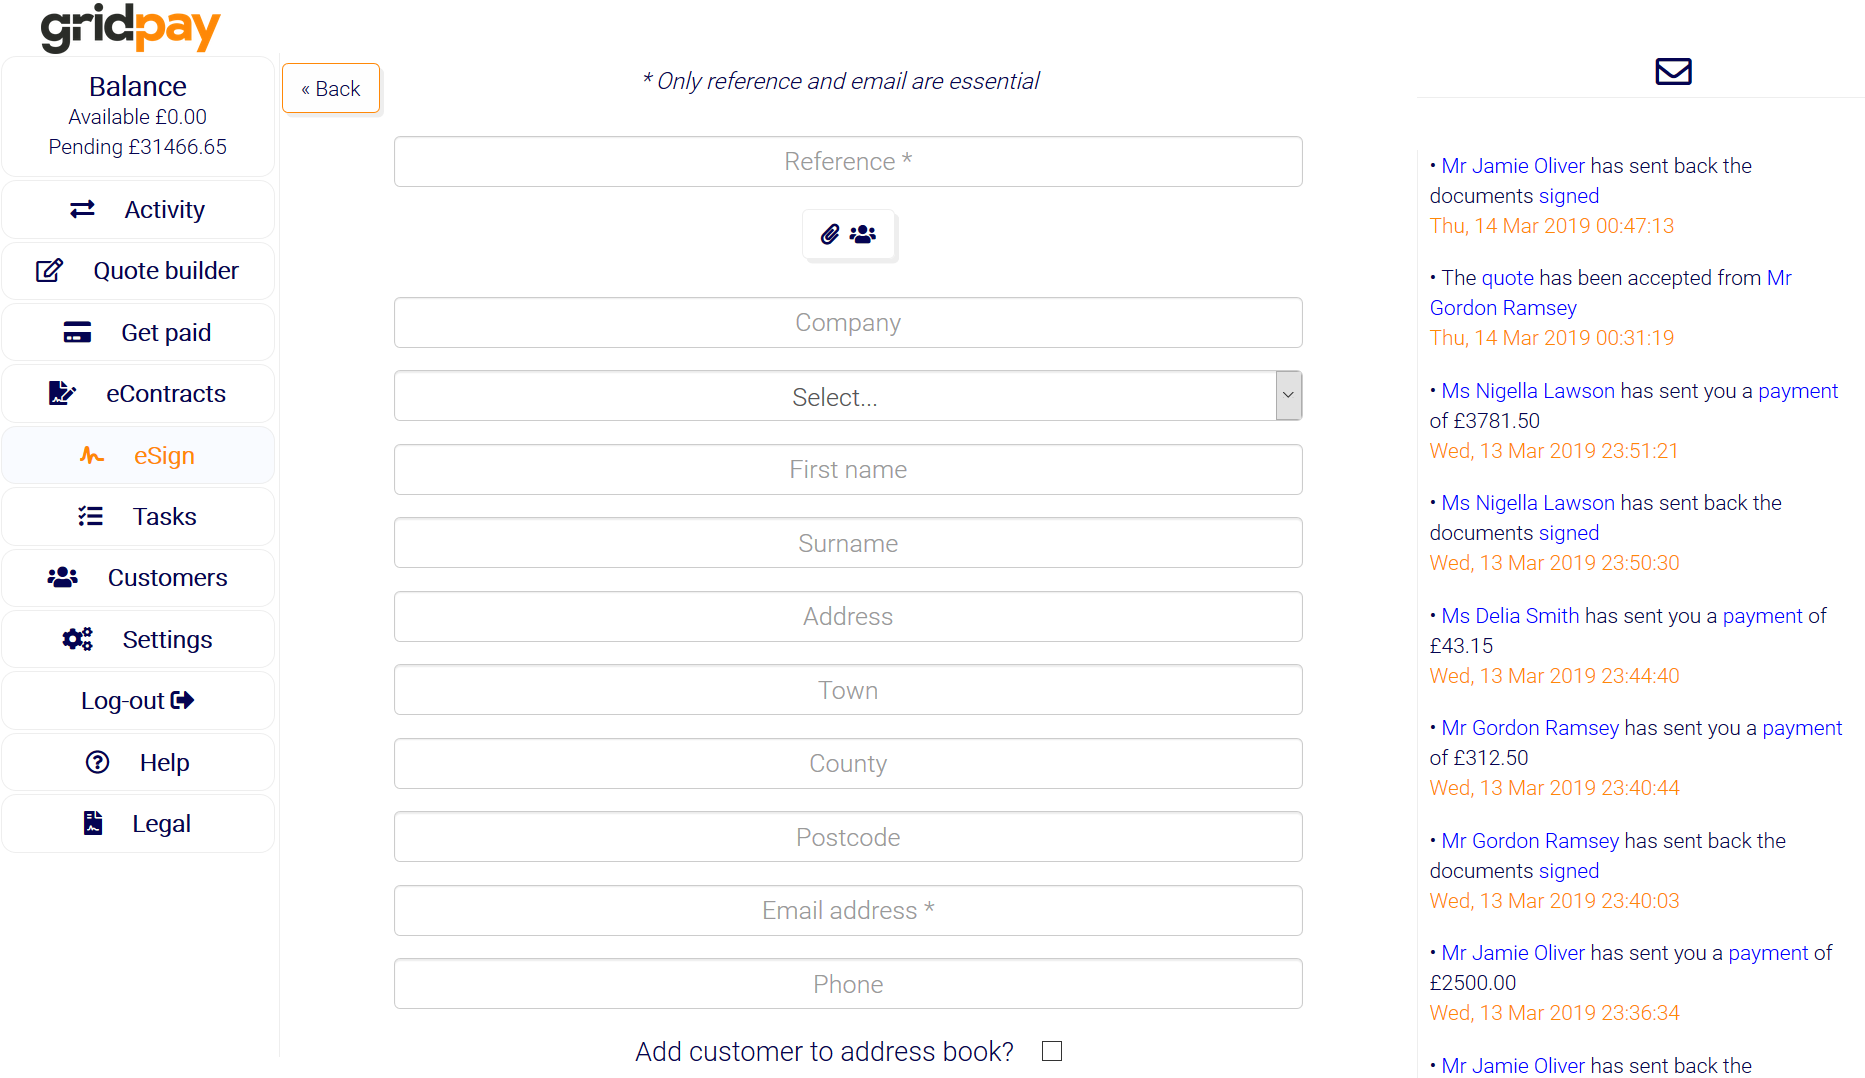
To start a new quote, click on Quote builder then click New near the top left of the page. You will be presented with a form to add a new customer (If the customer is already stored in your address book just click the attach button, then click on the customer’s name). Fill out as much of the form as you can, only email address and reference are essential. Then click create. If you would like to add the customer to you address book for future use, be sure to check the checkbox at the bottom.
The quote will then be built pre-filling in as many details as we possibly can. In the top section (under the reference) there are buttons to edit customer details, delete the quote and create an invoice (we’ll talk more about creating invoices later). A quote can not be deleted once accepted. The text area in the top section can be edited to your needs and will become the main email body when you send the quote.
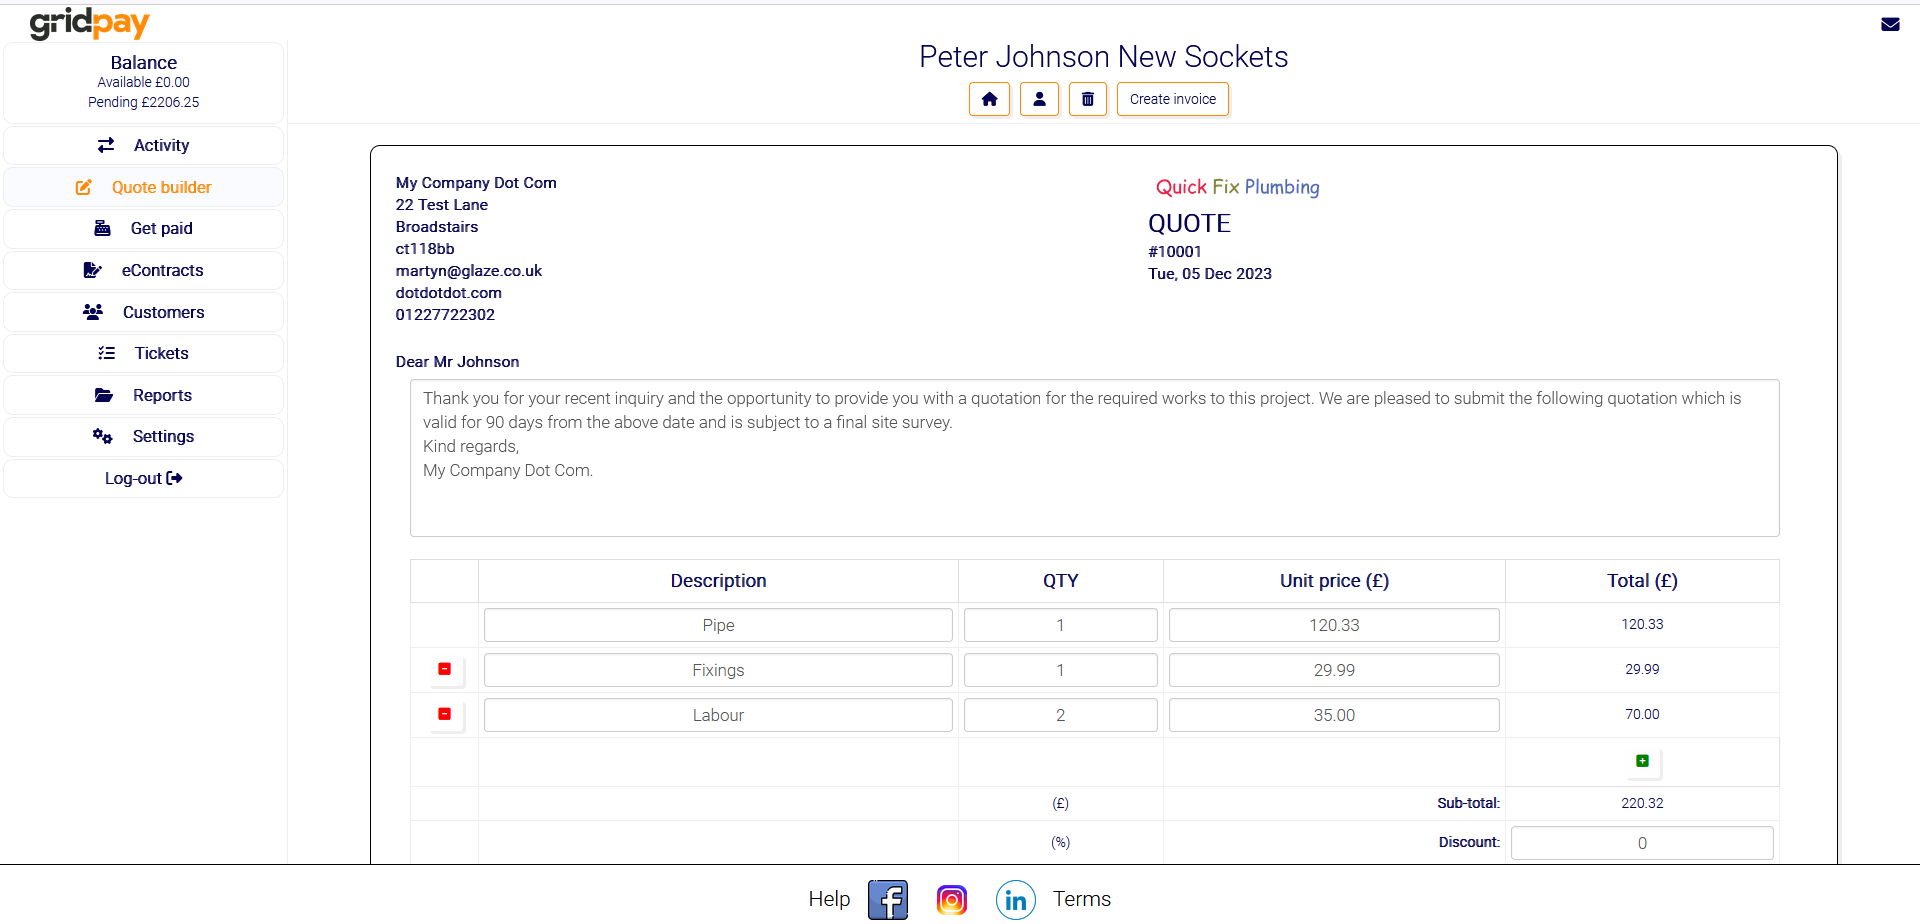
The bottom section of the quote builder is where you compile the itemized quote. It can have as many items as you require. You add more items by clicking the green + button on the right-hand side. Simply describe each item, type how many (QTY) and the price of each item. The quote builder works everything else out for you.
You can change the tax rate if you require, for sending VAT exempt quotes (e.g. supply only items). You are also able to offer and display discounts.
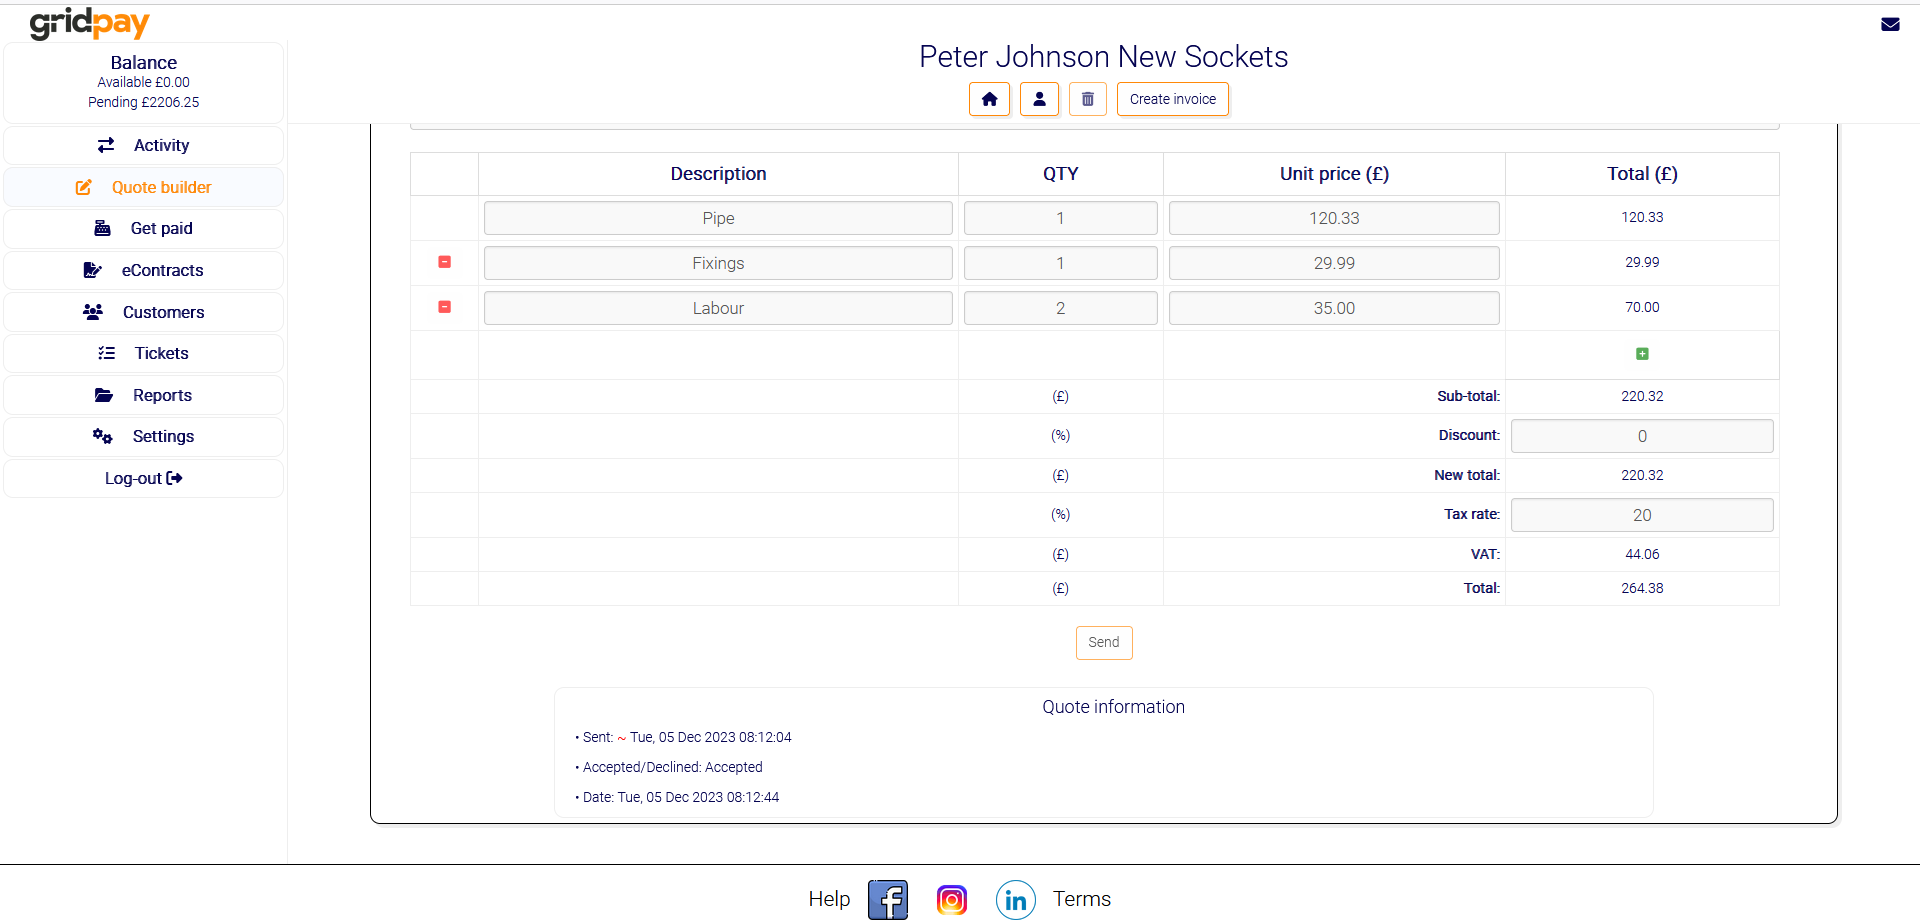
Once you have finished building the quote just click send. The customer can accept or decline the quote directly through the email that they receive. You will receive a notification in you control panel when the customer either accepts or declines the quote. Gridpay also logs the time and date of when you sent the quote and when the quote was either accepted or declined.
If your quote is accepted and the work complete, you can generate an invoice from the quote. Just reload the quote and click create invoice. The invoice will be generated with all the same details as the quote and will be placed in the Get Paid section of Gridpay. You can then change the invoice as required or just send it as is and get paid straight into your Gridpay account.
To start a new invoice, click on Get paid then click New near the top left of the page. You will be presented with a form to add a new customer (If the customer is already stored in your address book just click the attach button, then click on the customer’s name). Fill out as much of the form as you can, only email address and reference are essential. Then click create. If you would like to add the customer to you address book for future use be sure to check the checkbox at the bottom.
The invoice will then be built pre-filling in as many details as we possibly can. In the top section (under the reference) there are buttons to edit customer details and delete and duplicate the invoice (we’ll talk more about duplicating invoices later). The text area in the top section can be edited to your needs and will become the main email body when you send the invoice.
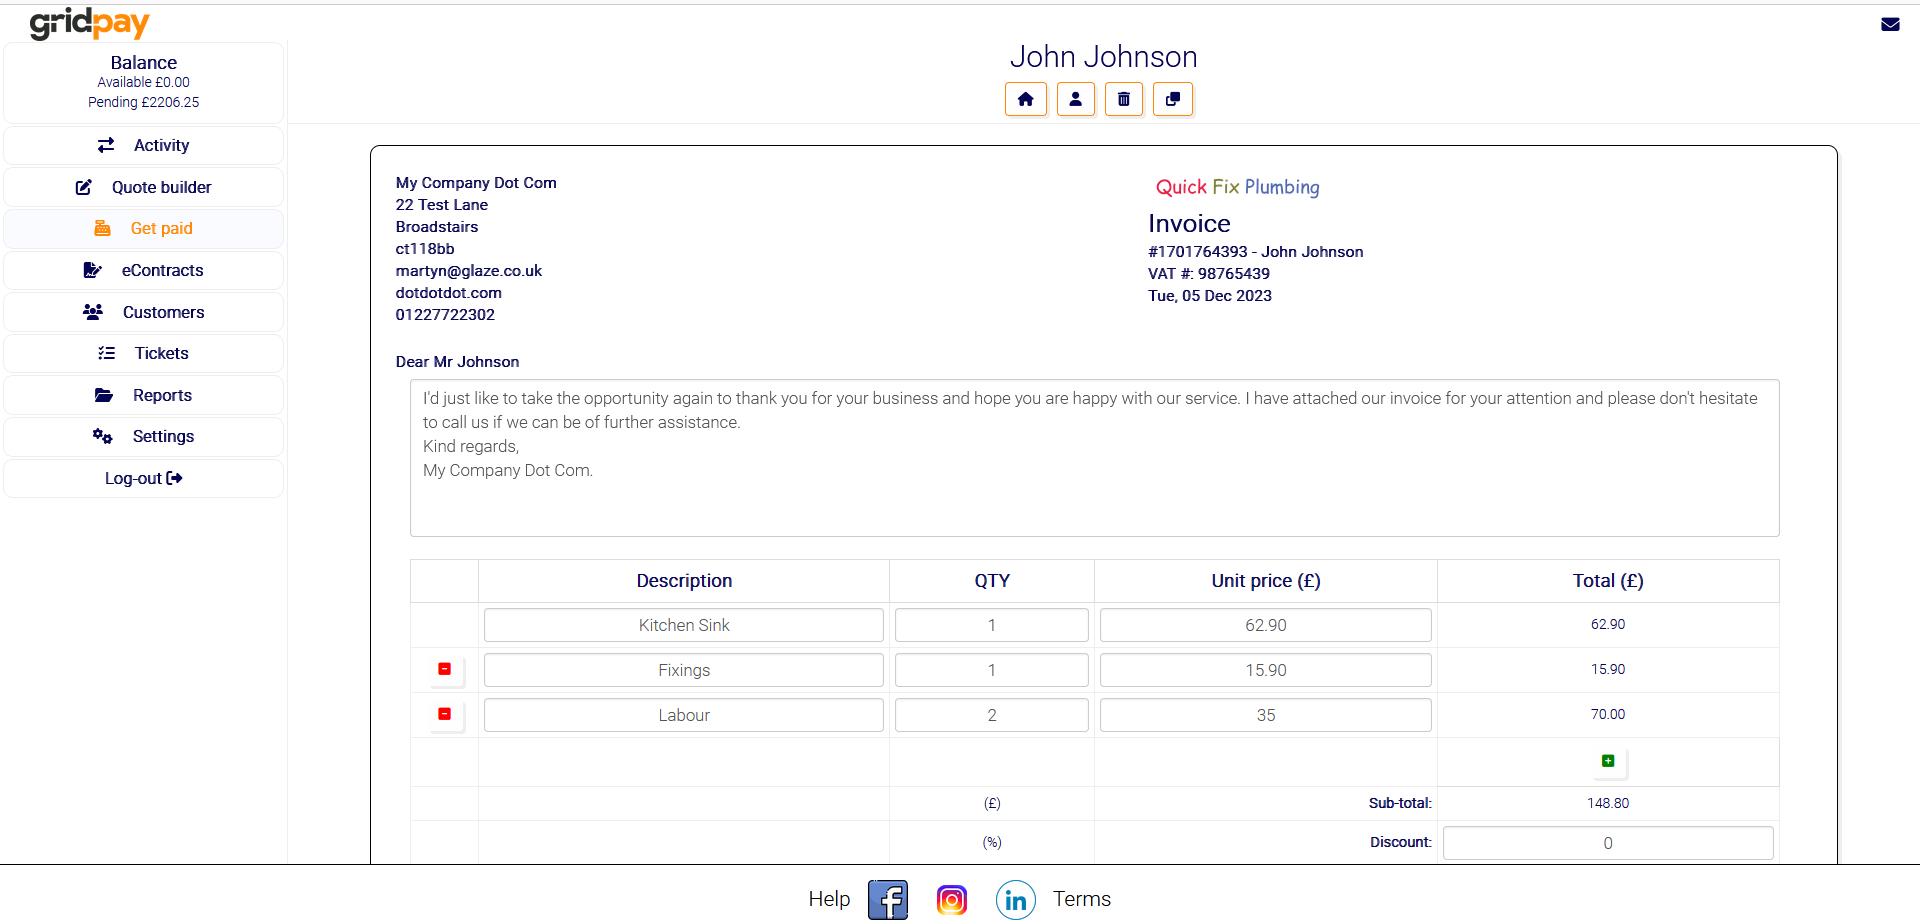
The bottom section of the invoice builder is where you compile the itemized invoice. It can have as many items as you require. You add more items by clicking the green + button on the right-hand side. Simply describe each item, type how many (QTY) and the price of each item. The invoice builder works everything else out for you.
You can change the tax rate if you require, for sending VAT exempt invoices (e.g. supply only items). You are also able to offer and display discounts.
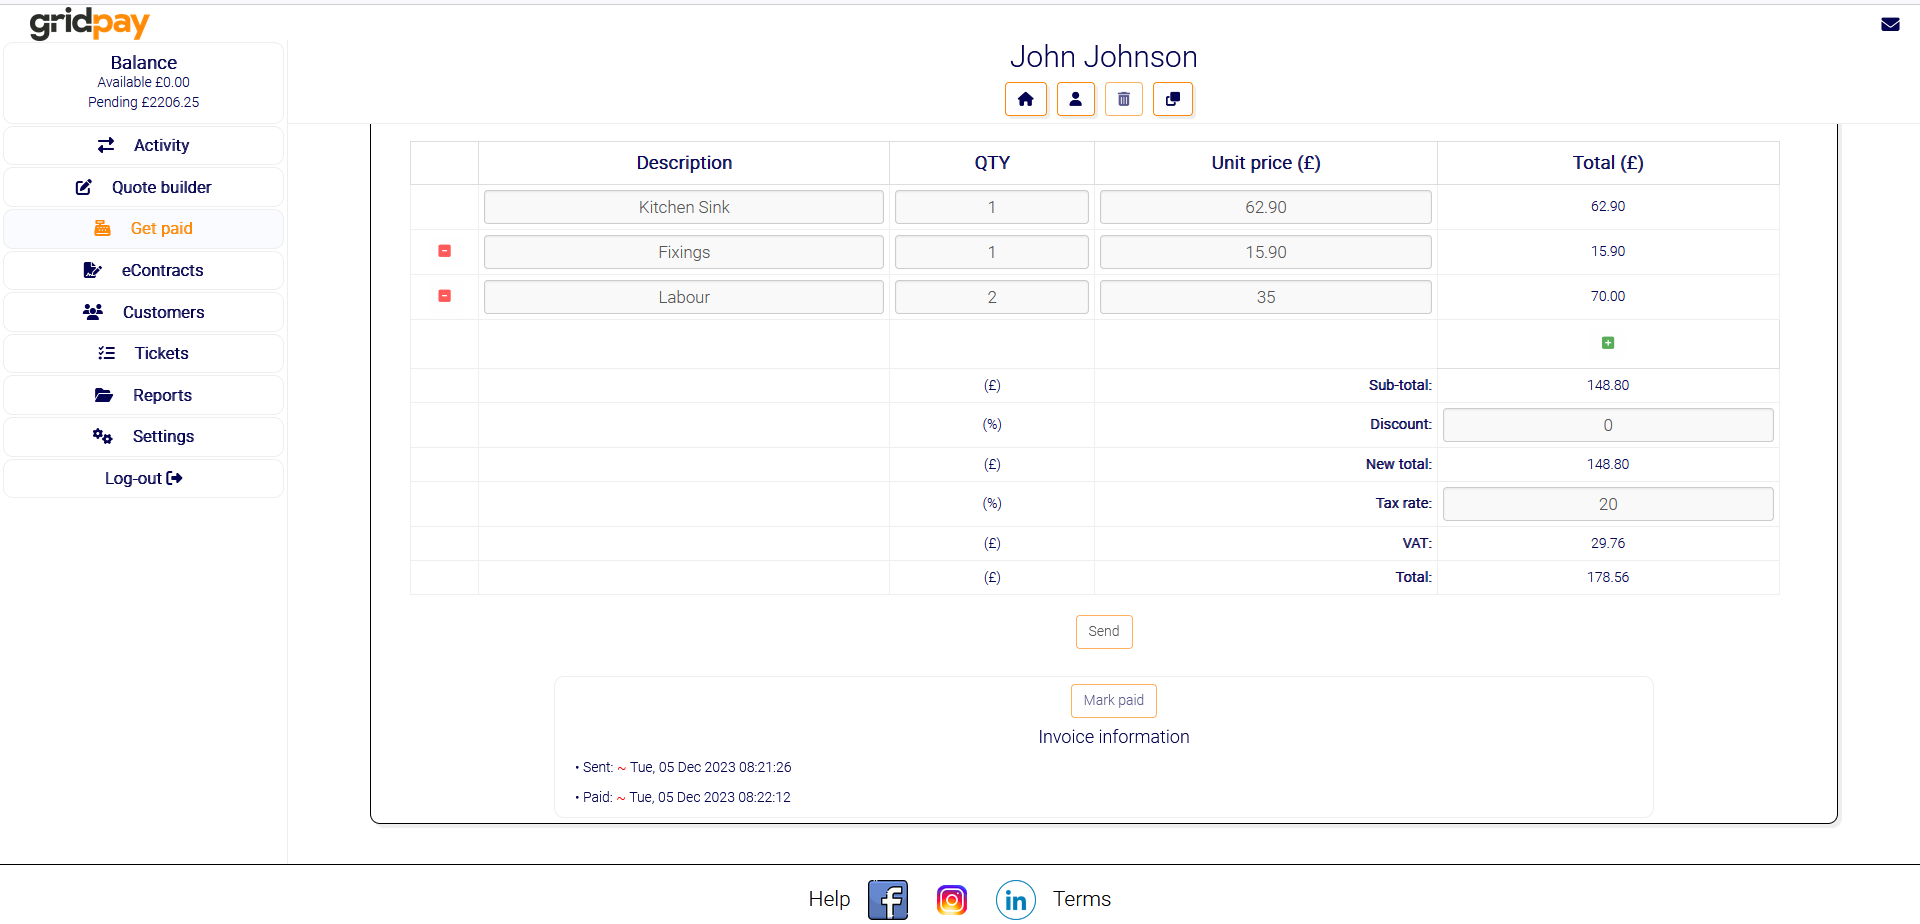
Once you have finished building the invoice just click send. The customer can pay the invoice straight into your Gridpay account through the email they receive. You will receive a notification in you control panel when the customer pays the invoice. Gridpay also logs the time and date of when you sent the invoice and when the invoice was paid.
You are also able to duplicate an invoice. This is handy in recurring billing situations. The duplicated invoice will be listed at the top of your invoices list in the Get Paid section and can be edited once opened.
- Intro
- Blocks
Introduction to eContracts
Gridpay eContracts have been designed to give you all the tools you need to build bespoke eContracts for whatever your project requires. Each contract begins with a contract and a deposit and finishes with the final payment. What happens in the middle is up to you.
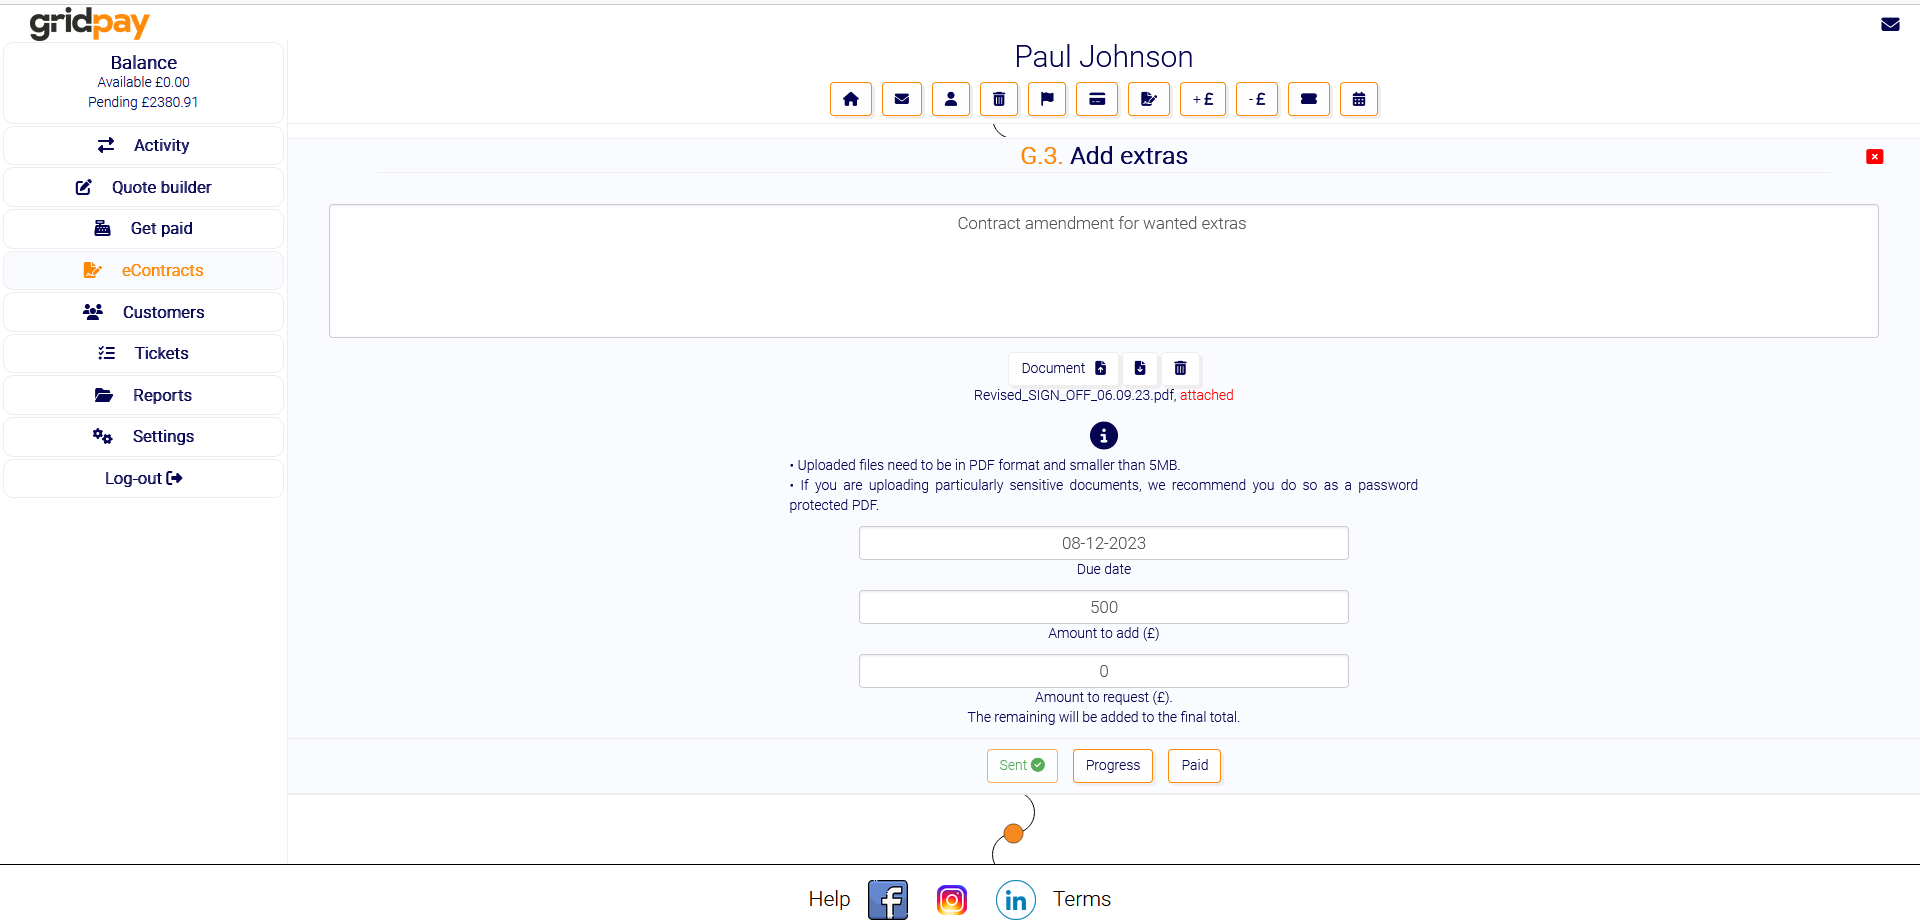
You are provided with a selection of widget blocks (tools) that allow you to customise the contract as you require, and each contract can be adjusted on the fly, to cover you for those unexpected circumstance during each project.
To start a new eContract, click on eContracts then click New near the top left of the page. You will be presented with a form to add a new customer (If the customer is already stored in your address book just click the attach button, then click on the customer’s name). Fill out as much of the form as you can, only email address and reference are essential. Then click create. If you would like to add the customer to you address book for future use be sure to check the checkbox at the bottom.
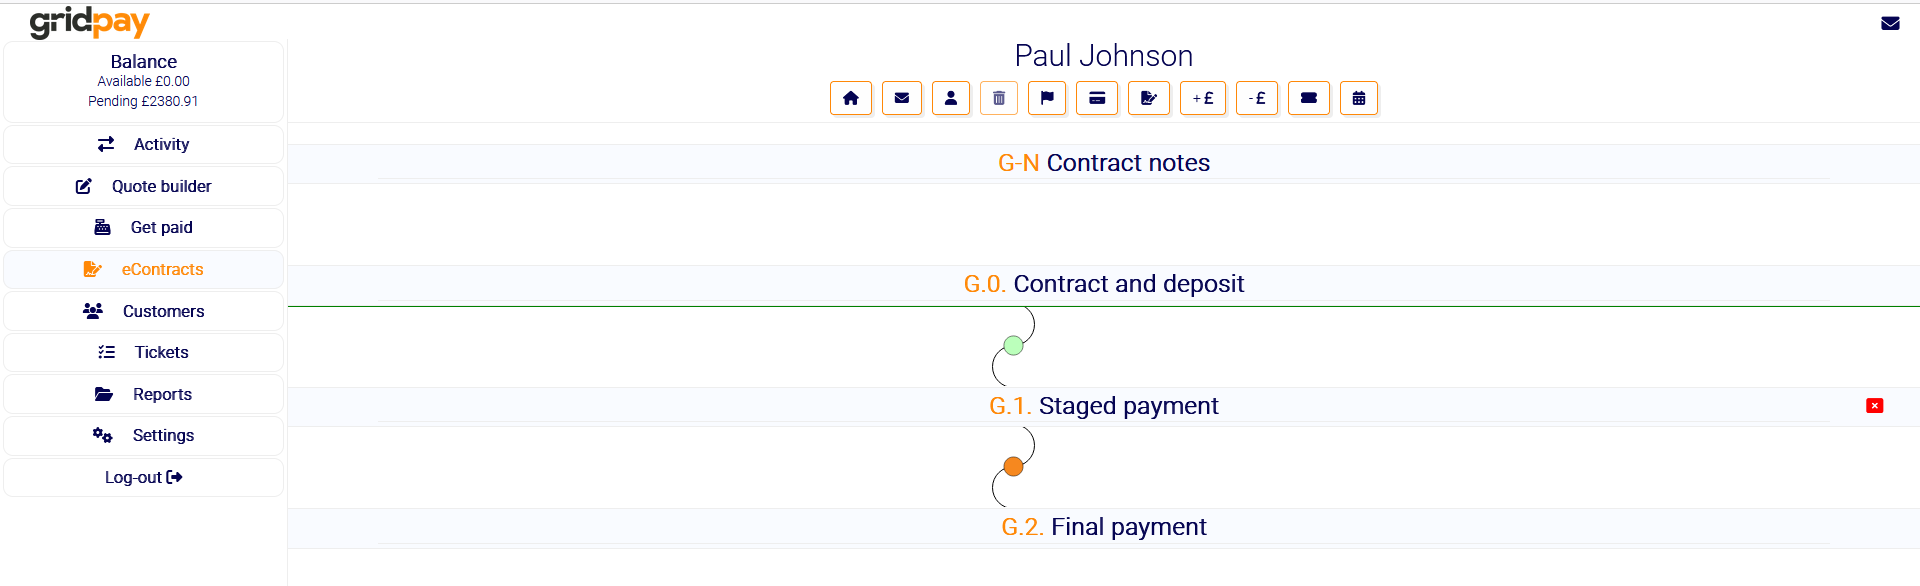
Once you have created the contract you will see two blocks in front of you (contract and deposit, final payment). Click the contract and deposit block to open it. In the top section of the contract block you have the option to upload three documents (terms and conditions, contract and pro-forma).
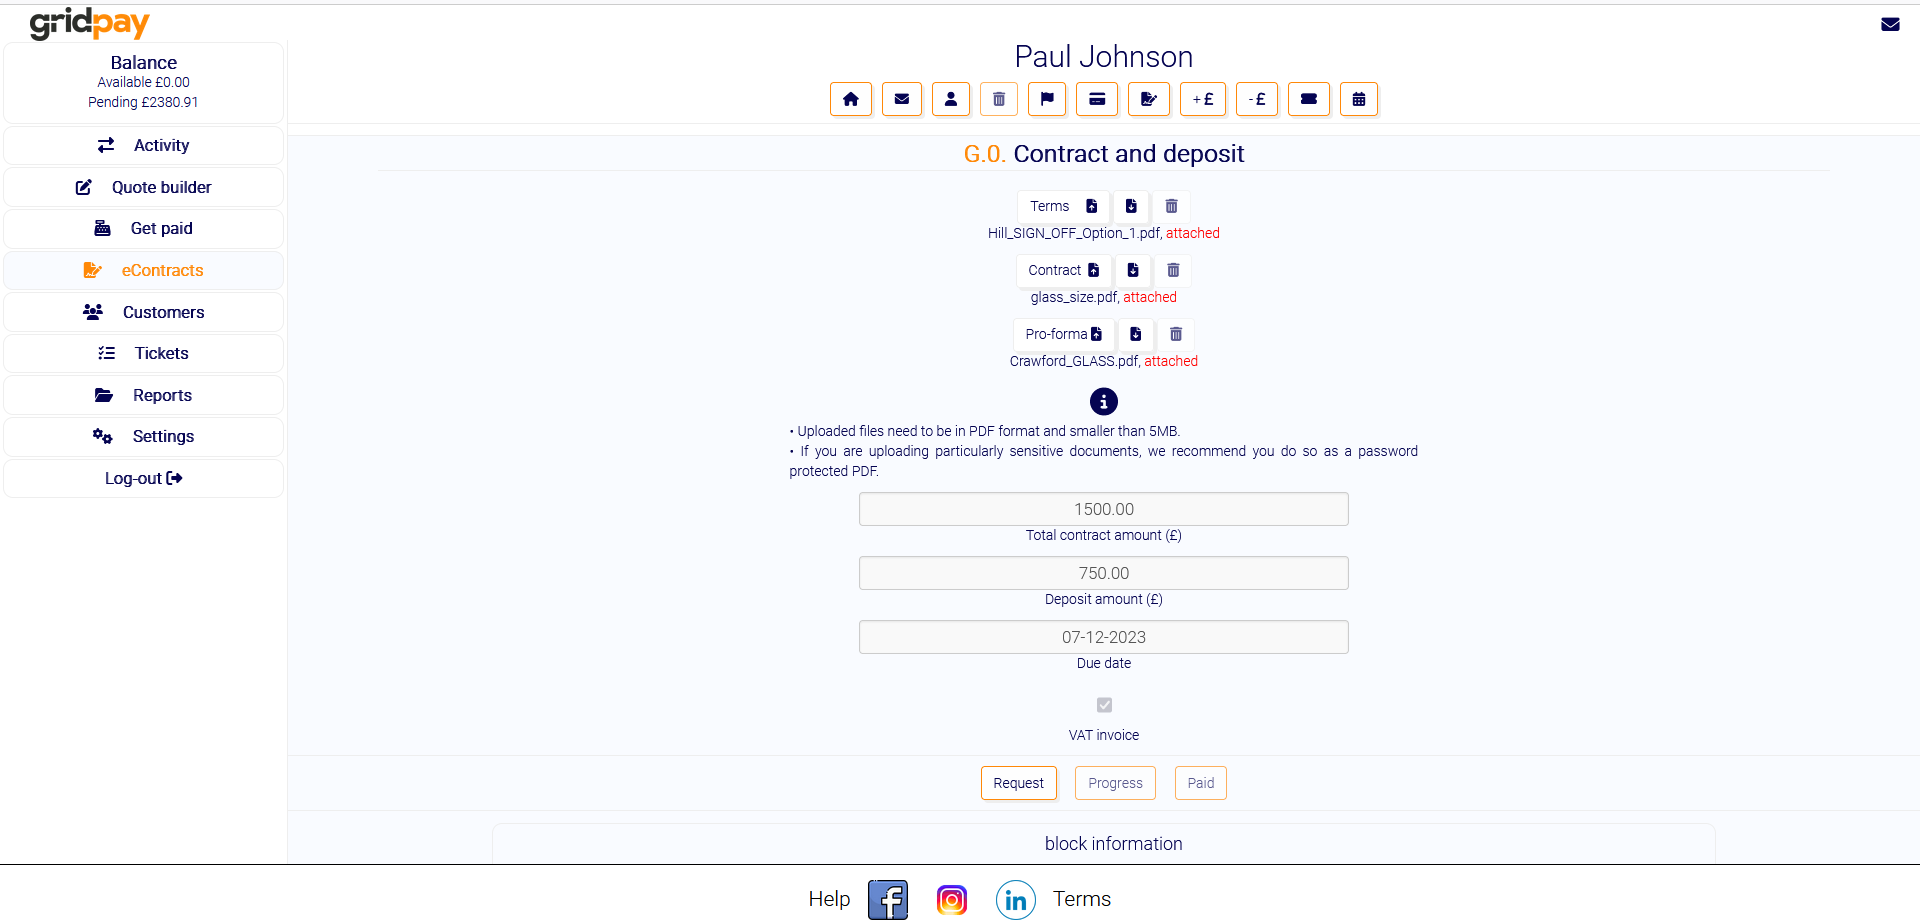
The only file that is essential for each eContract is the pro-forma (payment contract). The pro-forma will contain detailed payment information about the project at hand, such as a full itemised invoice and when the payment/s are expected to be paid.
How you use the contracts block is completely up to you and will also depend on how your business back office operates. Some business may have all their information in one contract (including their terms and conditions). In that case they would upload it all as a pro-forma. Most businesses would have a standard terms and conditions document and a pro-forma for each job. In that case they would up load a terms document and a pro-forma. The upload contract is optional and available only if you need to attach another document.
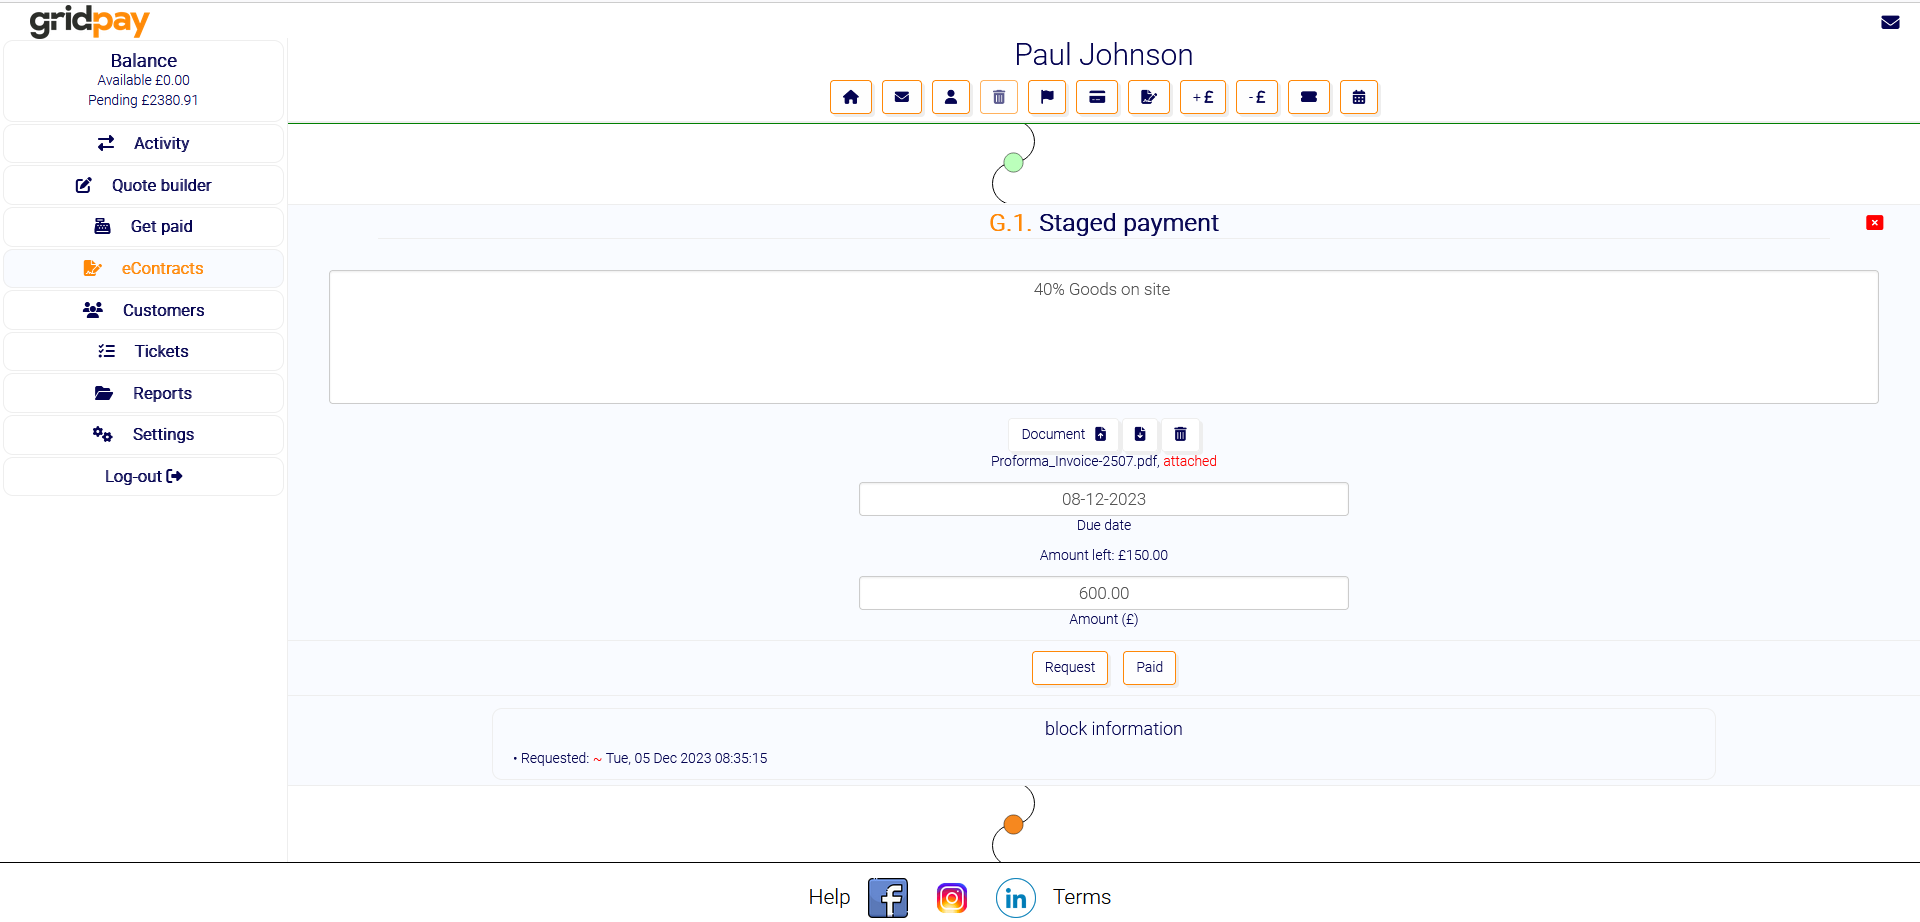
The next stage is to fill out the total contract amount (£), the amount of deposit you want to request (£) and set a due date for when you expect the documents back signed and paid. If you don’t want to take a deposit just set the deposit amount to 0.
To begin the eContract click the request button. This will automatically send a deposit and signature request to the customer. That’s it, you’ve built your first eContract with Gridpay.
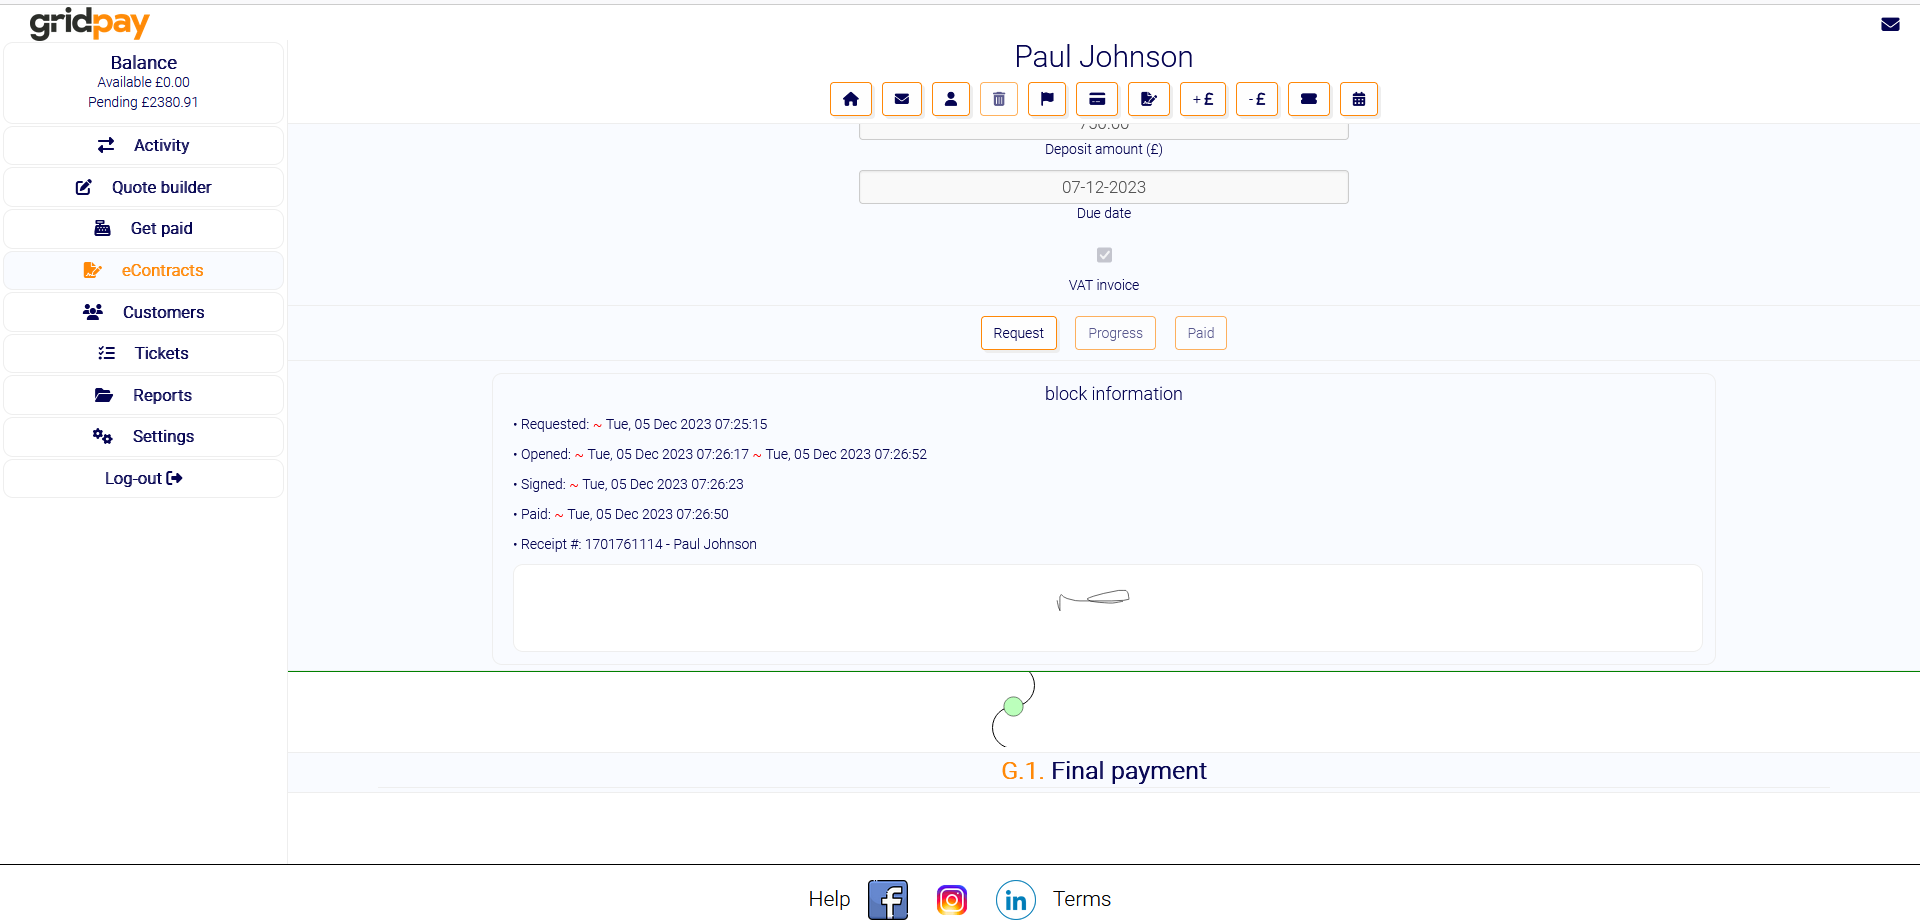
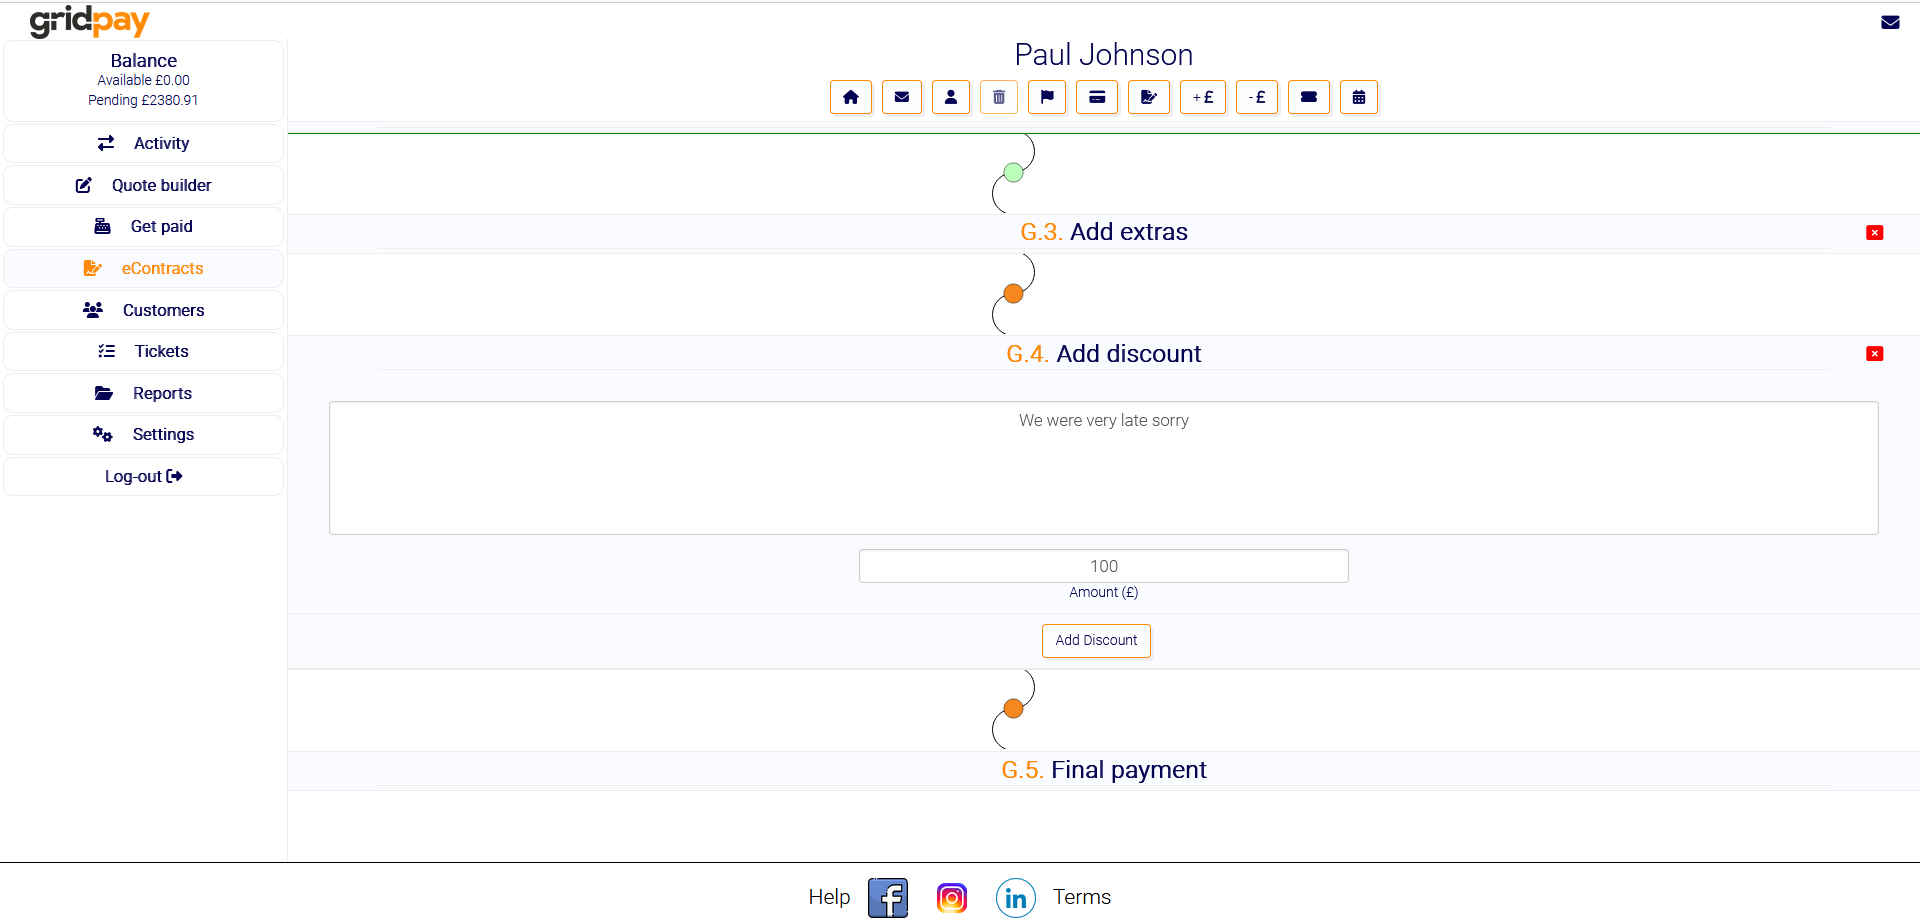
Once the documents have been signed and deposit paid you will receive a notification in your control panel. By reloading the eContract (click eContract then select the eContract from the list) and opening the block you will see at the bottom of the block all the signature and payment information. Once the block is complete the block light (under the block) will turn green.
Tip; a selection of blocks are provided for you, which makes the eContract customizable on the fly. You can add payment stages, add extras and discounts and much more. Click here to learn how.

The address book in Gridpay is a very handy feature to get familiar with, it is opened by clicking on the customers button. You can store as many customers in here as you like and once saved, you can use the customer details for all actions across the Gridpay platform. You can attach any customer in the address book to any quote, invoice or eContract.
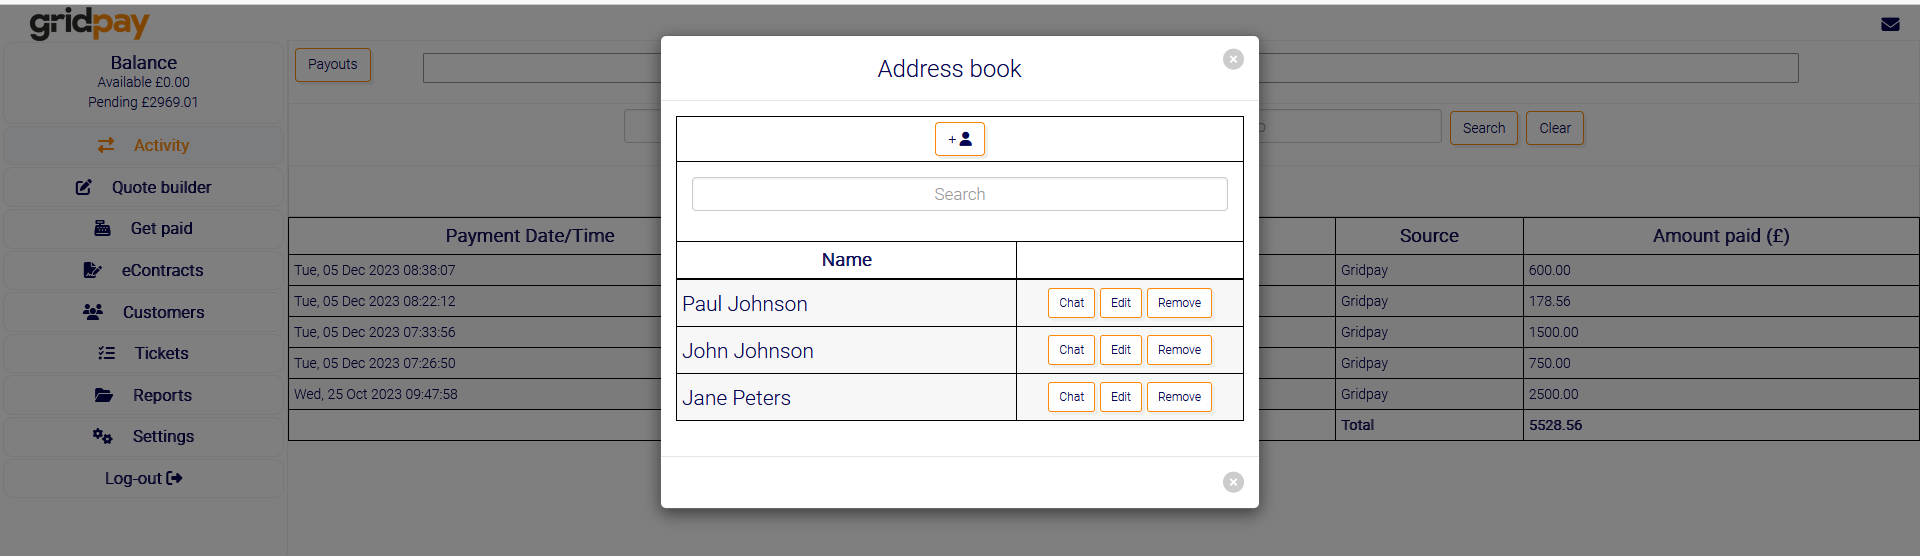
Once opened you can search the address book using the search bar at the top. To add more customers just click the + button at the top of the address book. You can also chat directly with the customer by clicking the chat button next to their name.
To request a new eSignature, click on eSign then click New near the top left of the page. You will be presented with a form to add a new customer (If the customer is already stored in your address book just click the attach button, then click on the customer’s name). Fill out as much of the form as you can, only email address and reference are essential. Then click create. If you would like to add the customer to you address book for future use be sure to check the checkbox at the bottom.
In the top section (under the reference) there are buttons to edit customer details and delete the eSignature. An eSignature can not be deleted once signed. The text area in the top section can be edited to your needs and will become the main email body when you send the eSignature request.
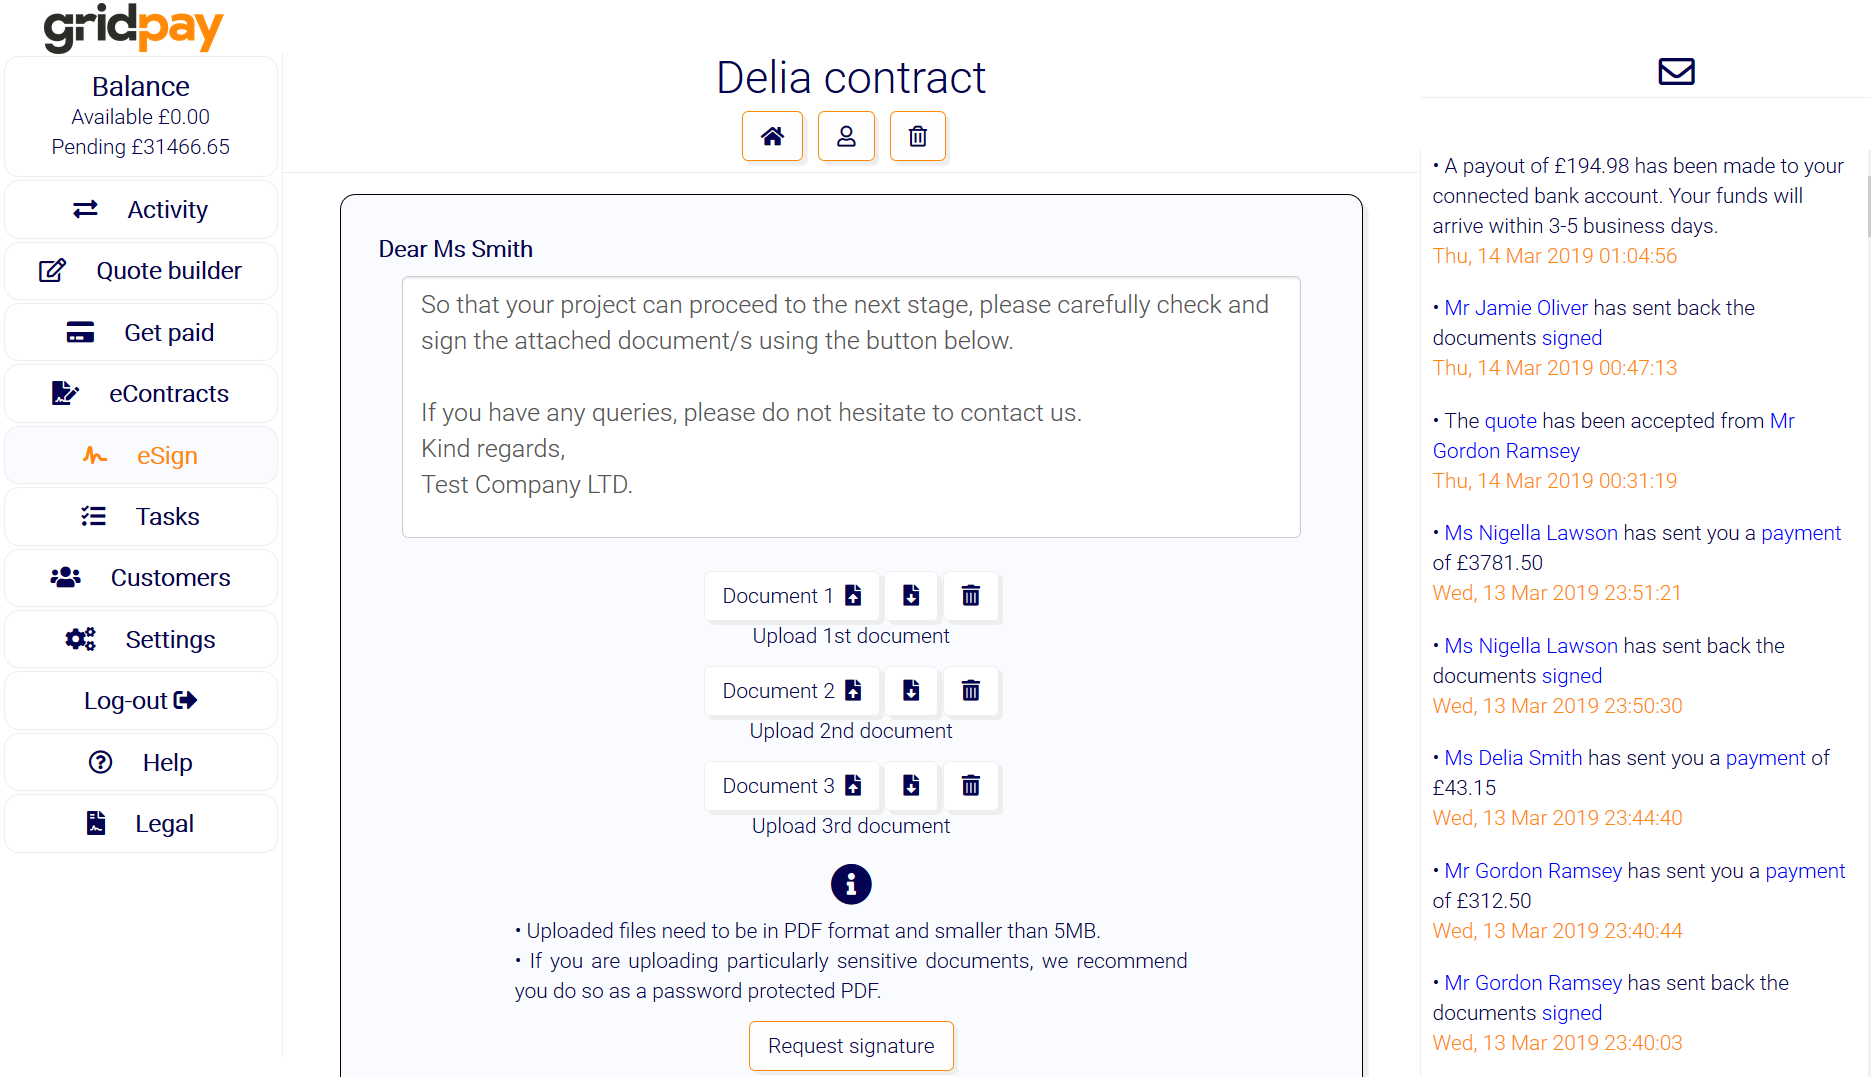
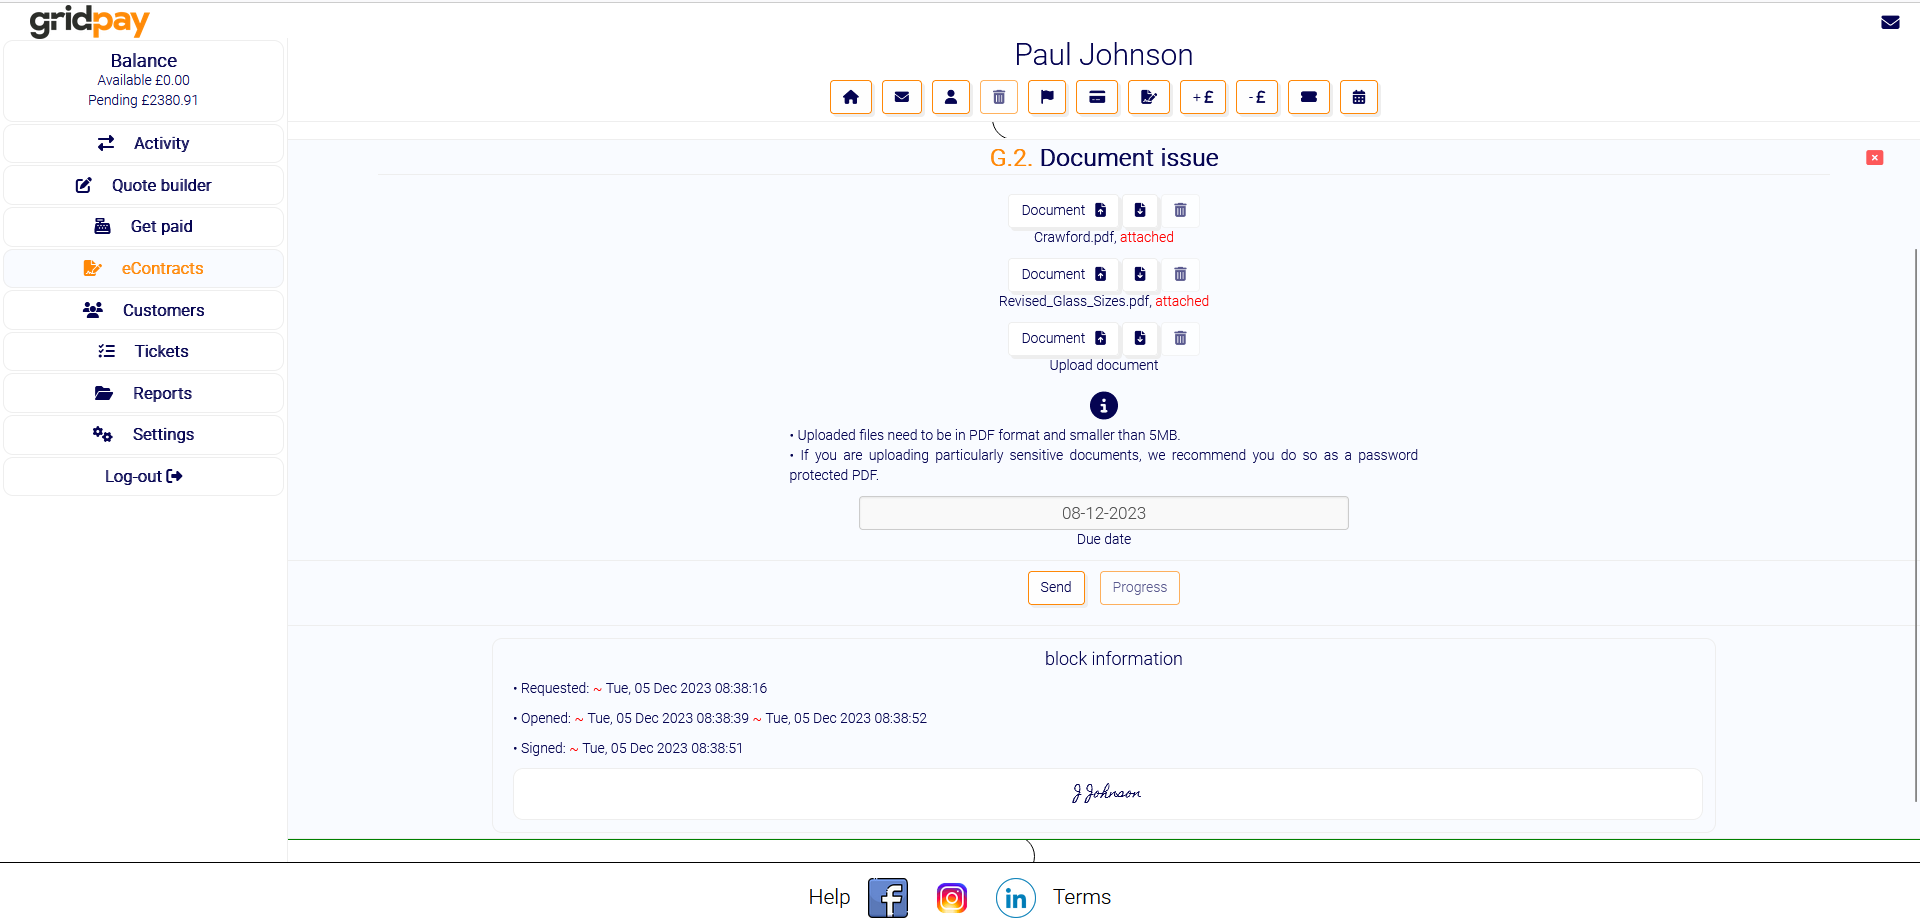
Under the text area you can upload up to 3 documents. It doesn’t matter which one you use if you only wish to upload 1 document. Here you can also download the documents you have uploaded and delete them. You cannot upload or delete a document once it has been signed. Documents must be in PDF format and we recommend uploading a password protected PDF if your documents are sensitive.
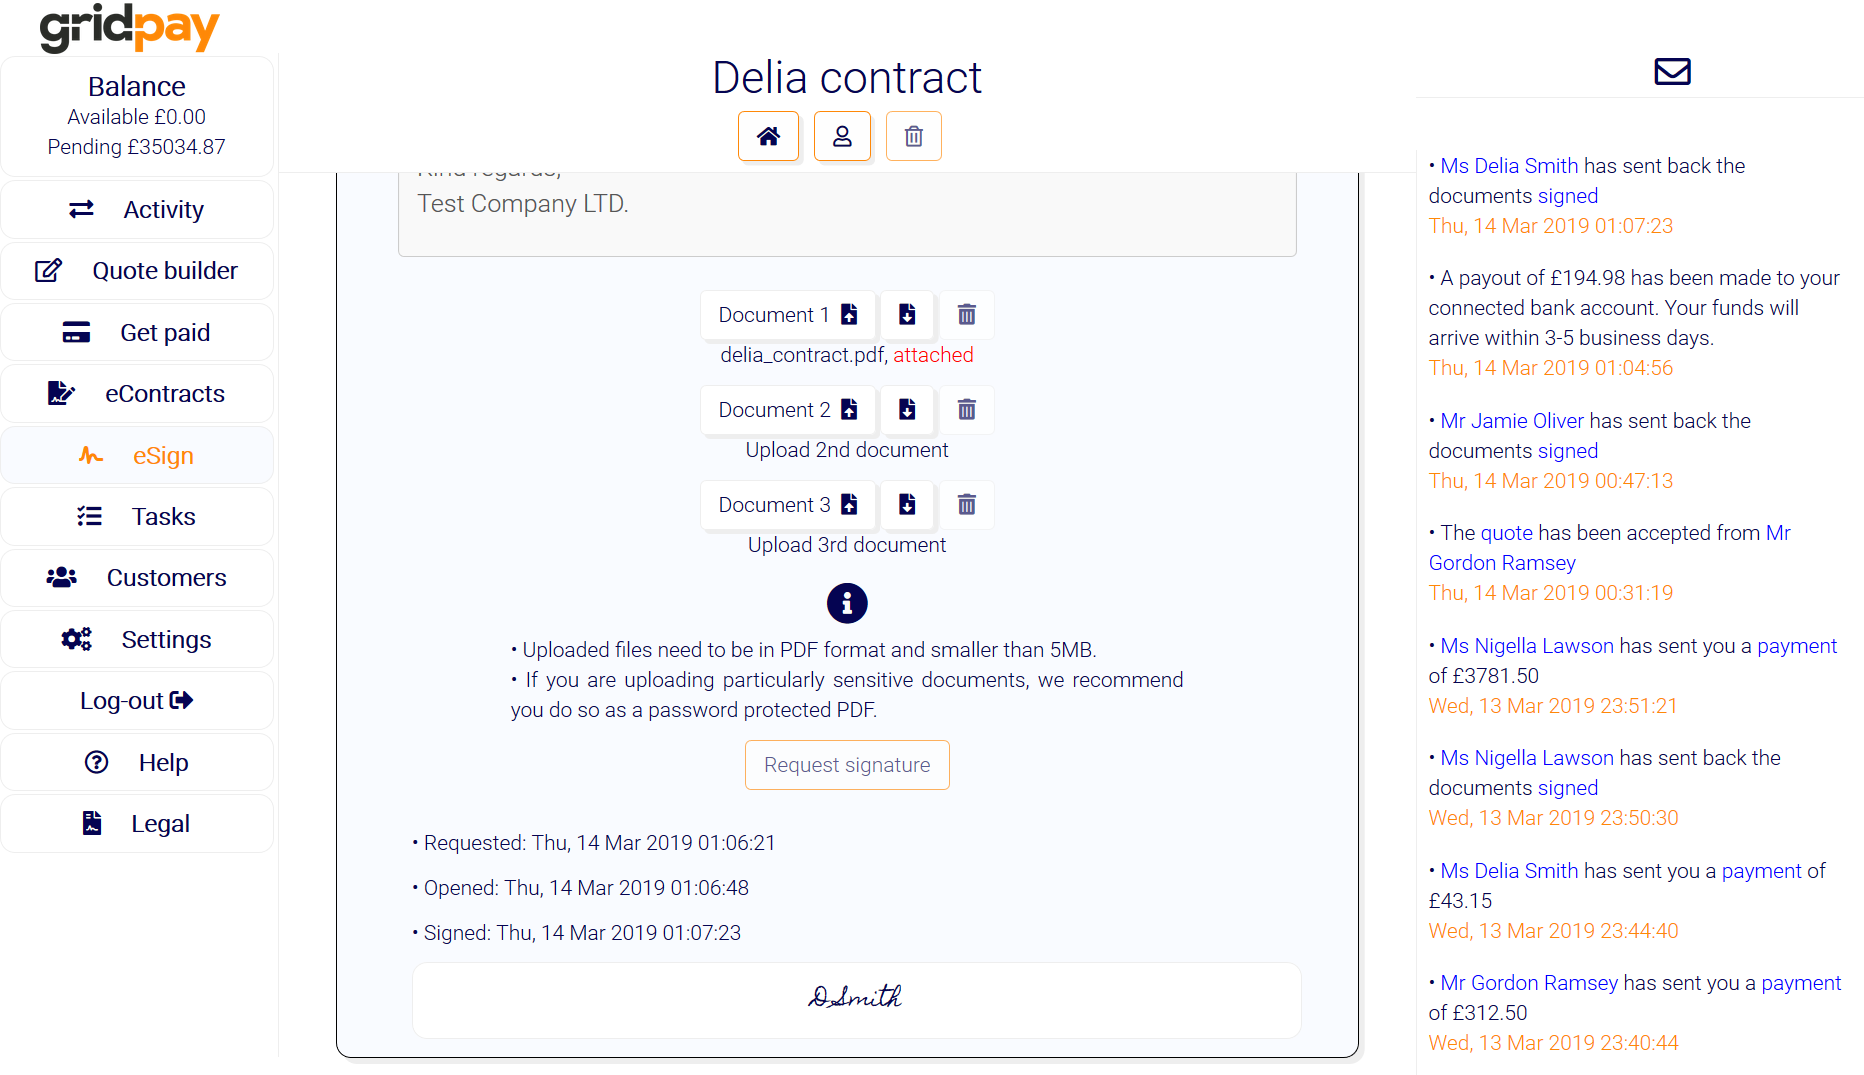
Once you have uploaded your documents, just click request signature. We send the documents directly to your customer for them to check and eSign. Once the customer has signed the documents, you will receive a notification in your control panel. The signature, details of when it was requested, opened and signed can be viewed by reloading the eSign request and scrolling to the bottom of the page. Once the documents are signed, they are locked in and cannot deleted or be altered in any way.
The settings menu is divided up into 3 sections (Business, Personal and Login). Each section can be accessed by the headings at the top of the page.
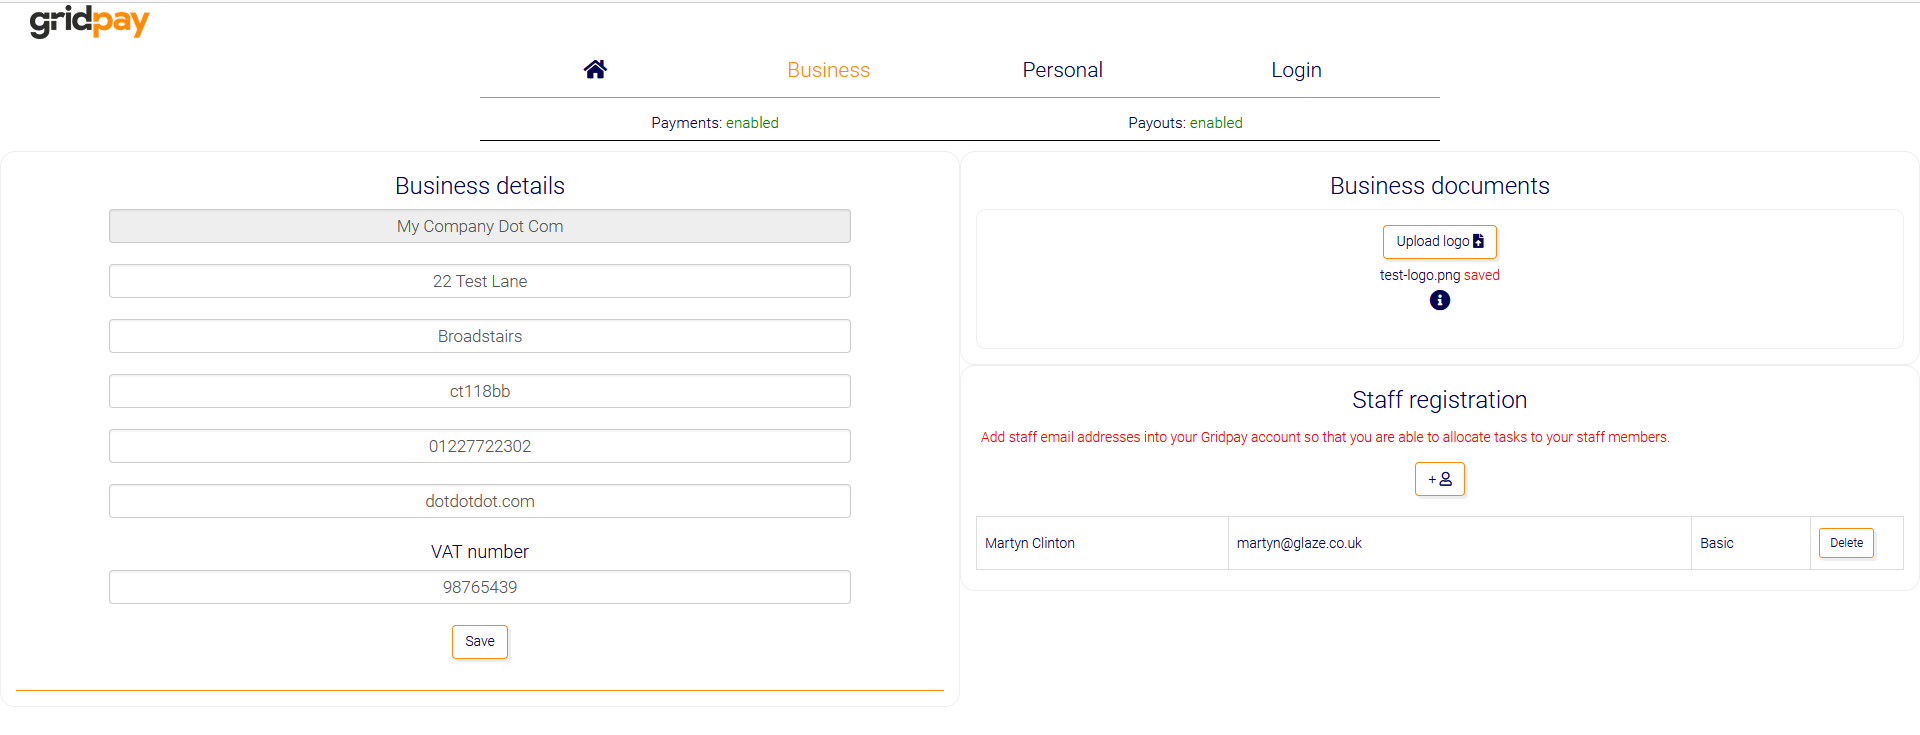
Under the business section you can update your business details, add staff members ready for ticket assignment, upload your company logo.
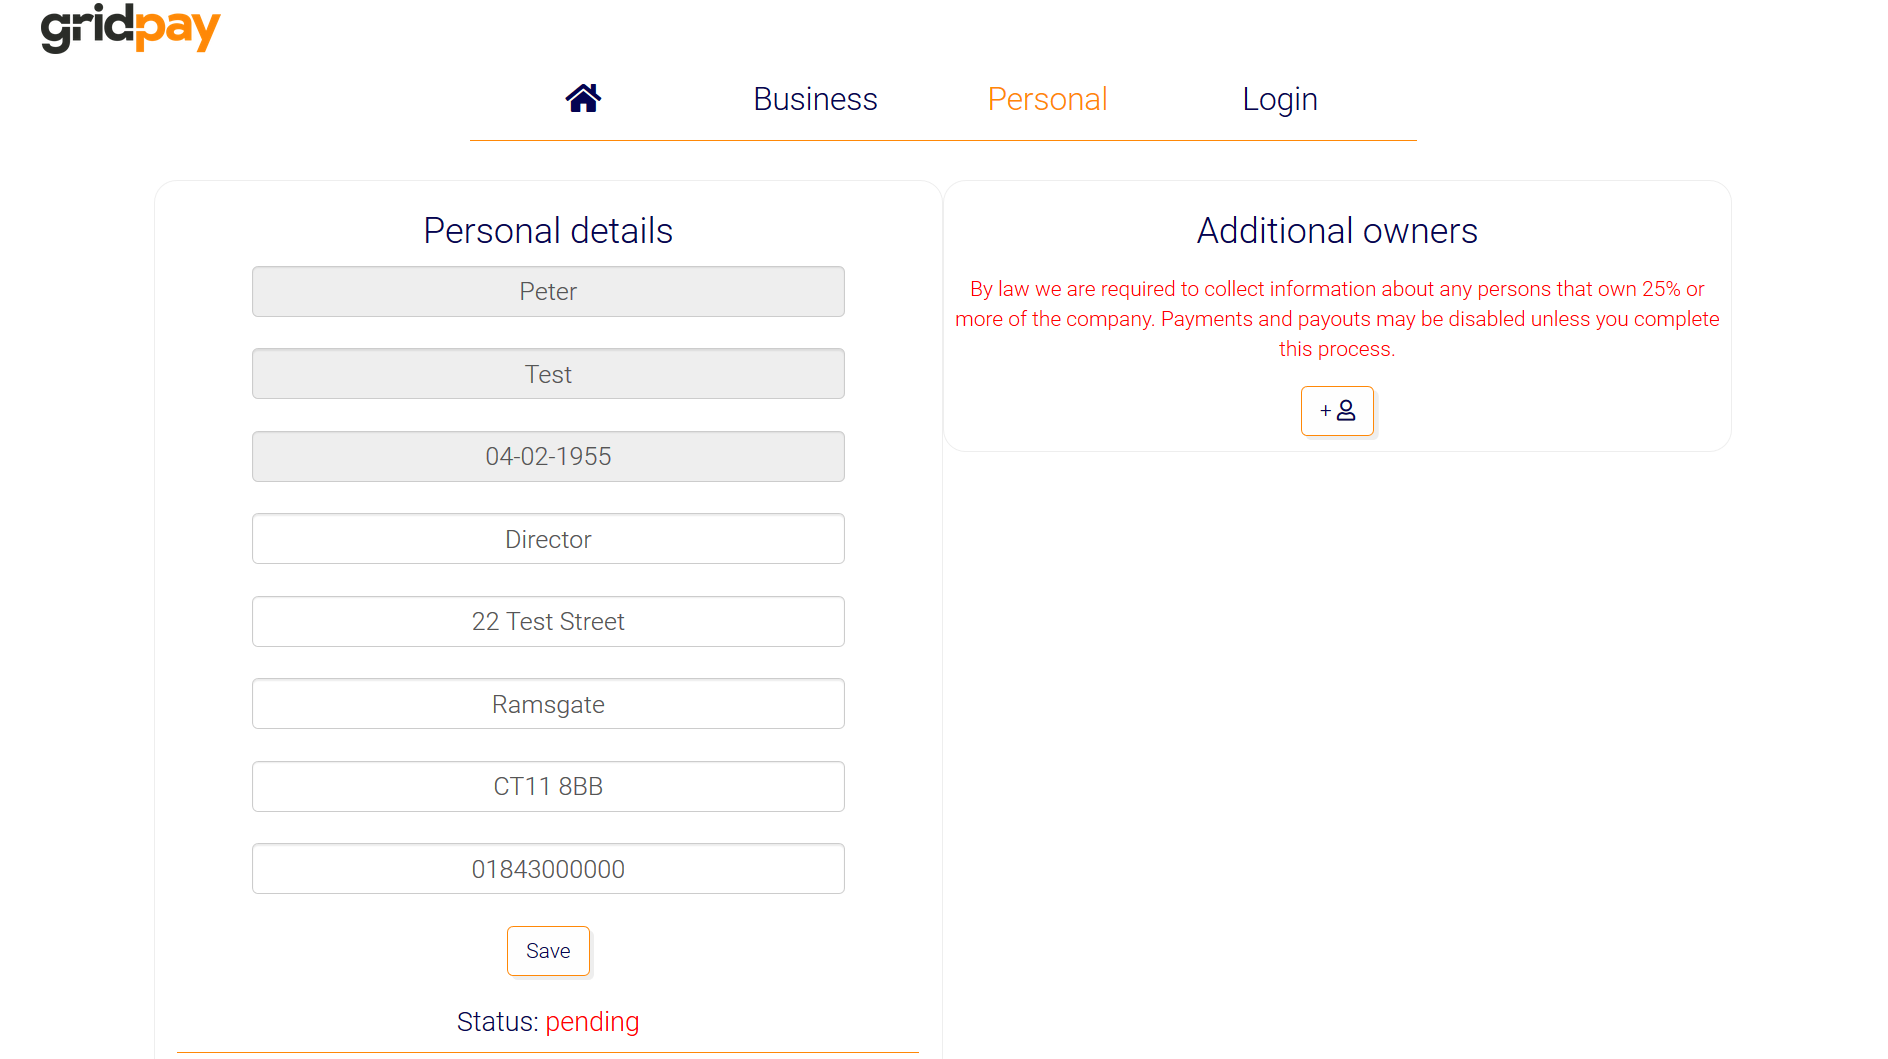
Under the personal section is where you can update information and identify your company representative. Also, here you can add, edit and identify your company owners. There are detailed instructions on this page on how to add and verify your company owners (just click the i).
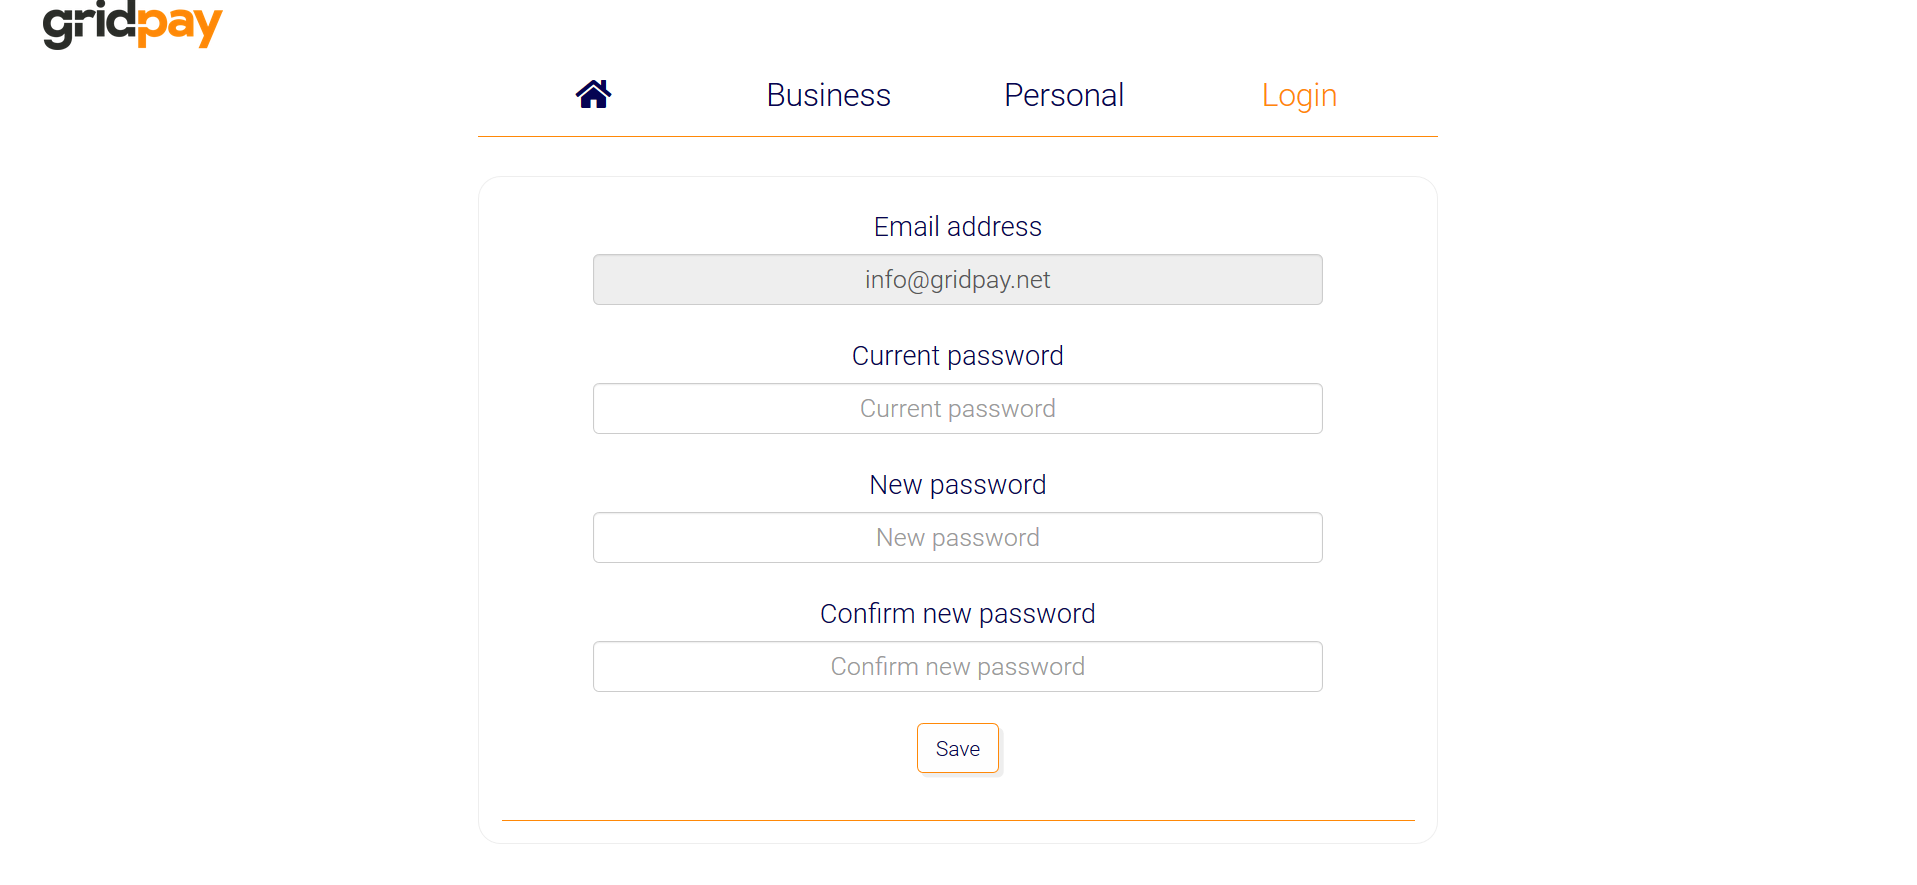
Under the login section is where you can change your login password. If you need to change your email address, please contact us.
You will receive notifications and messages regarding any event related to your Gridpay account in the notifications panel on the right-hand side of the control panel. Either by clicking on the customers name in the notifications panel or on chat in the address book, you can chat directly with the customer.
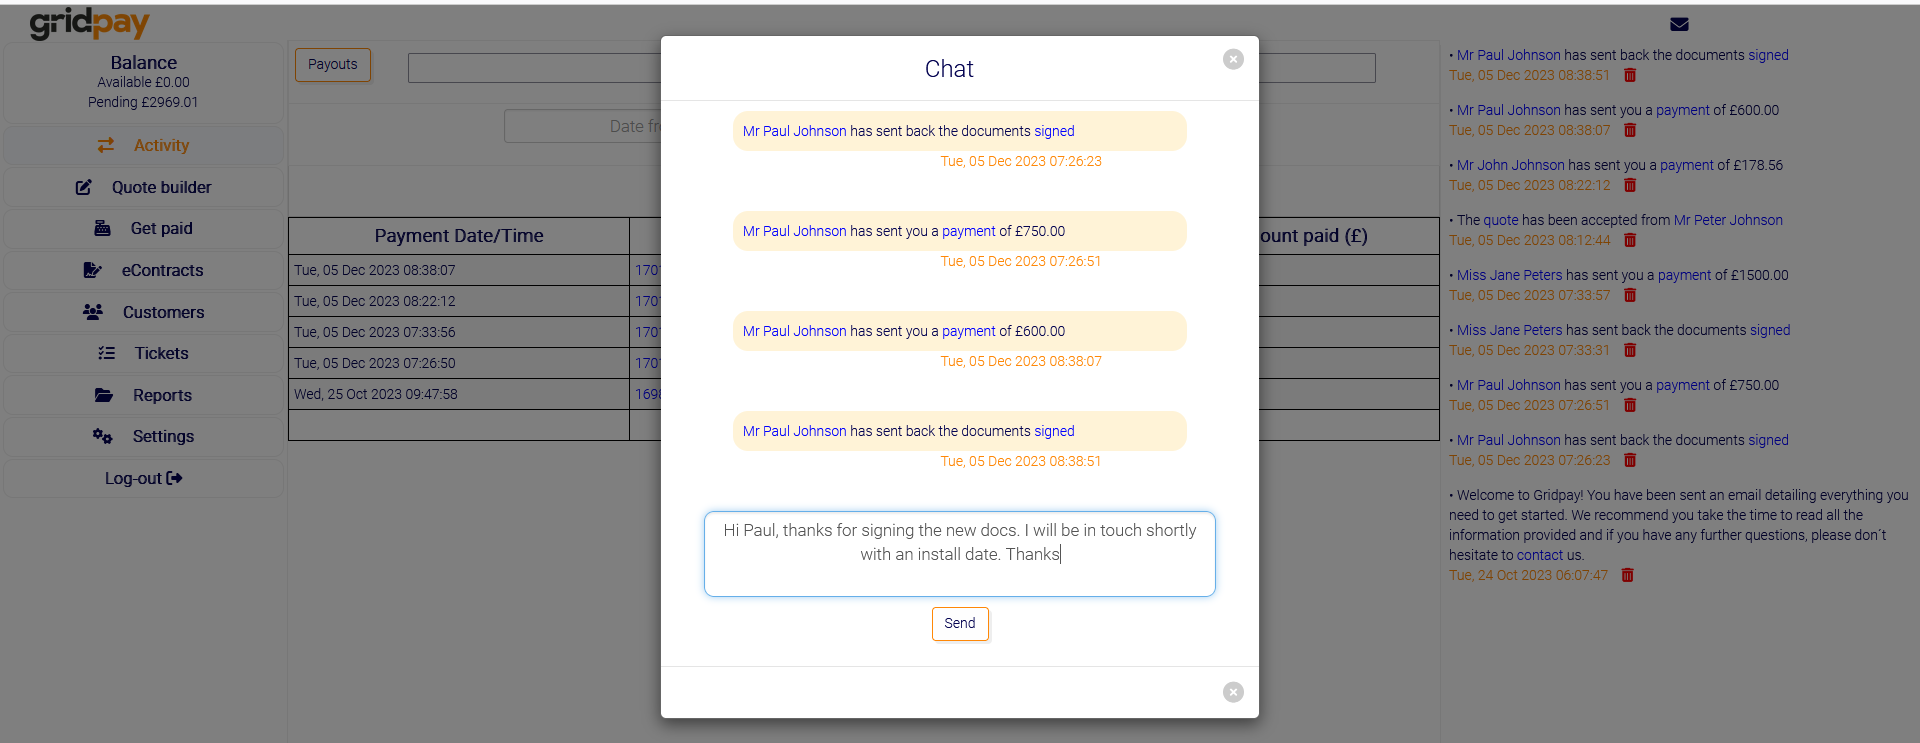
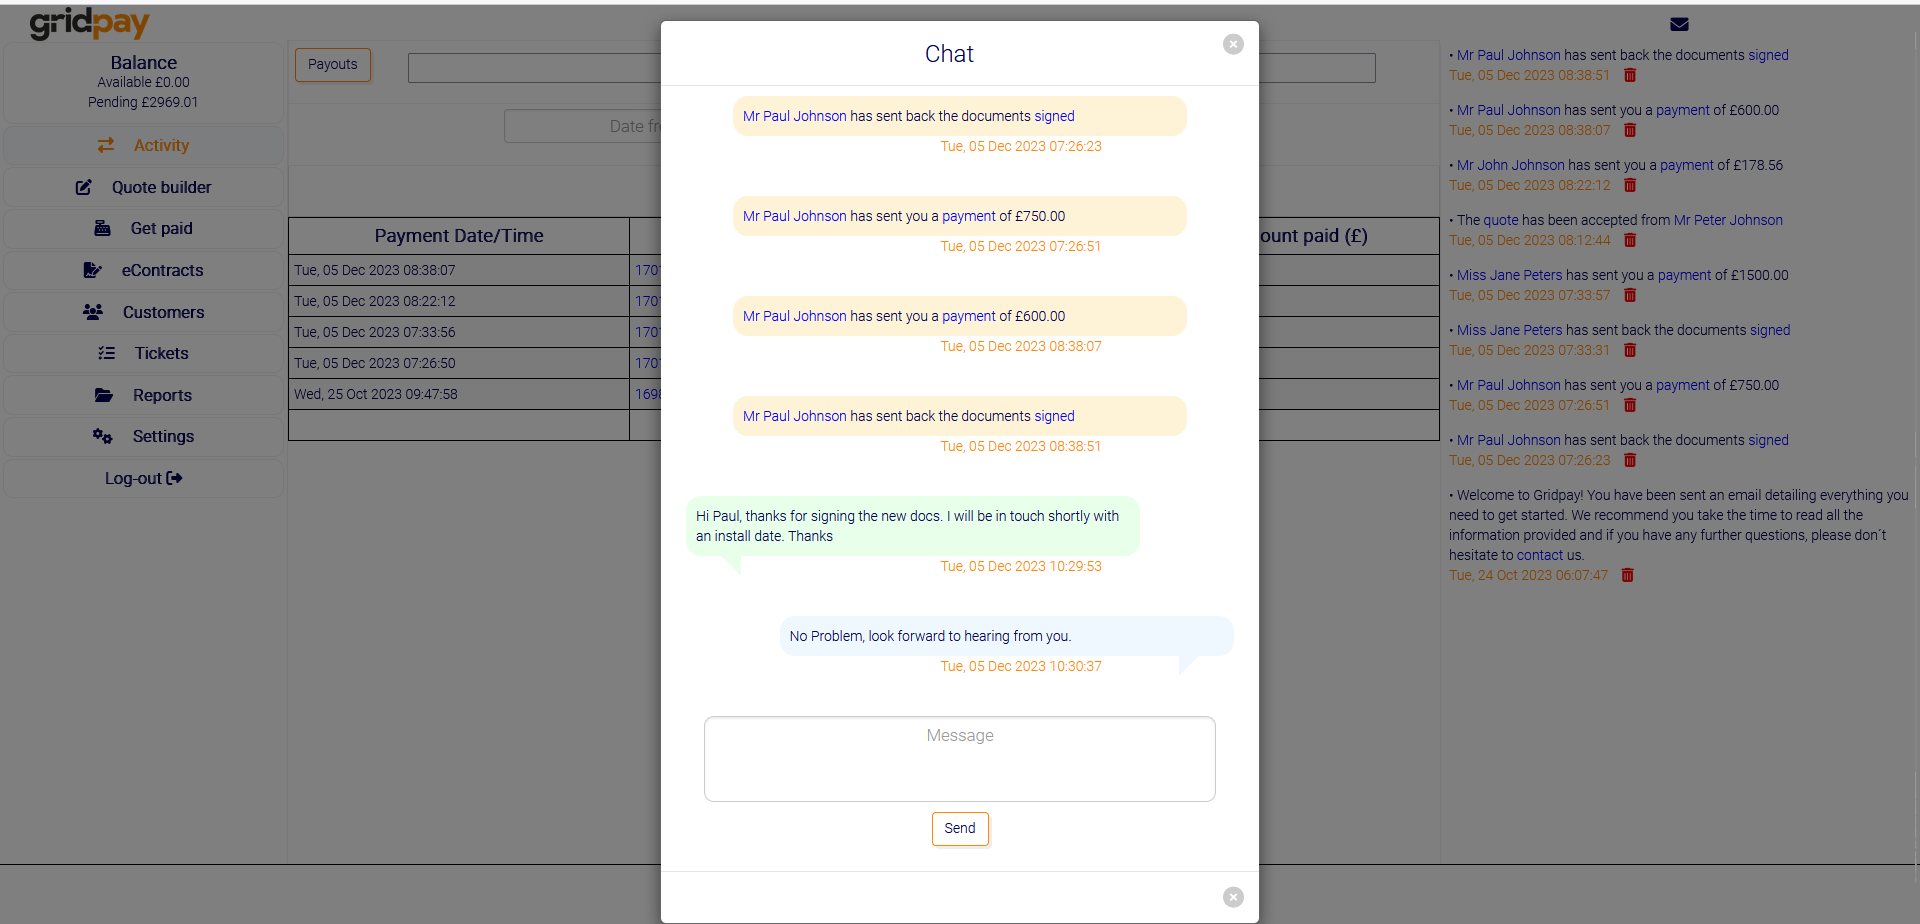
The customer receives an email where they can directly respond to you through Gridpay. All chats are logged and time stamped for both parties to view anytime. The customers response comes straight through to the notifications panel. All notifications with regards to Gridpay events are displayed in the chat box, in orange (such as payment received).
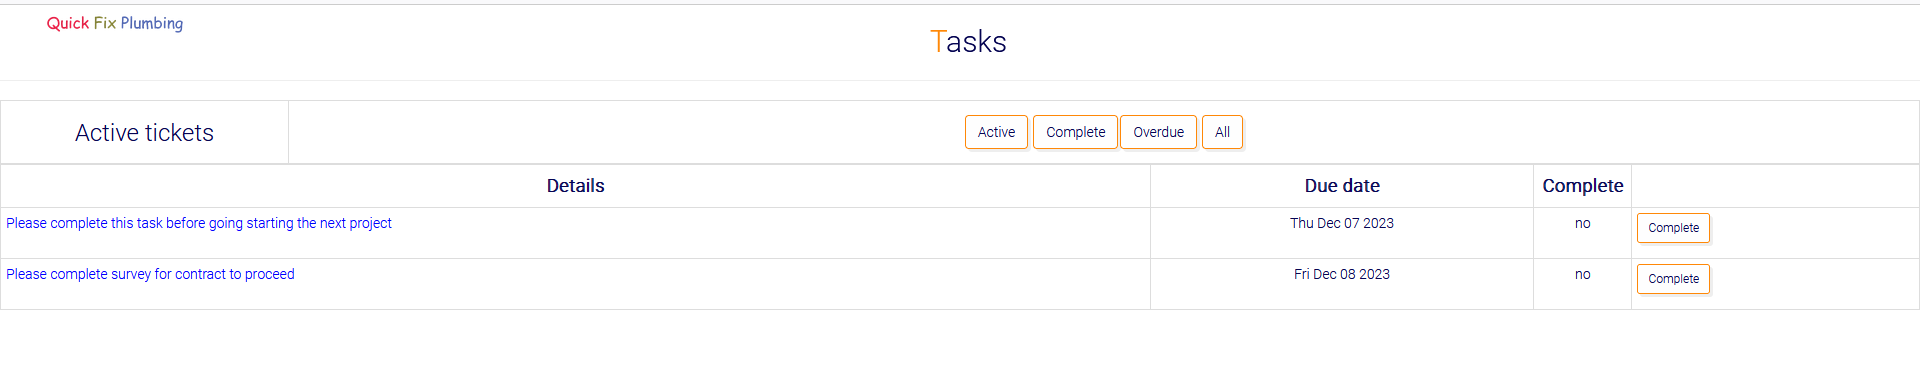
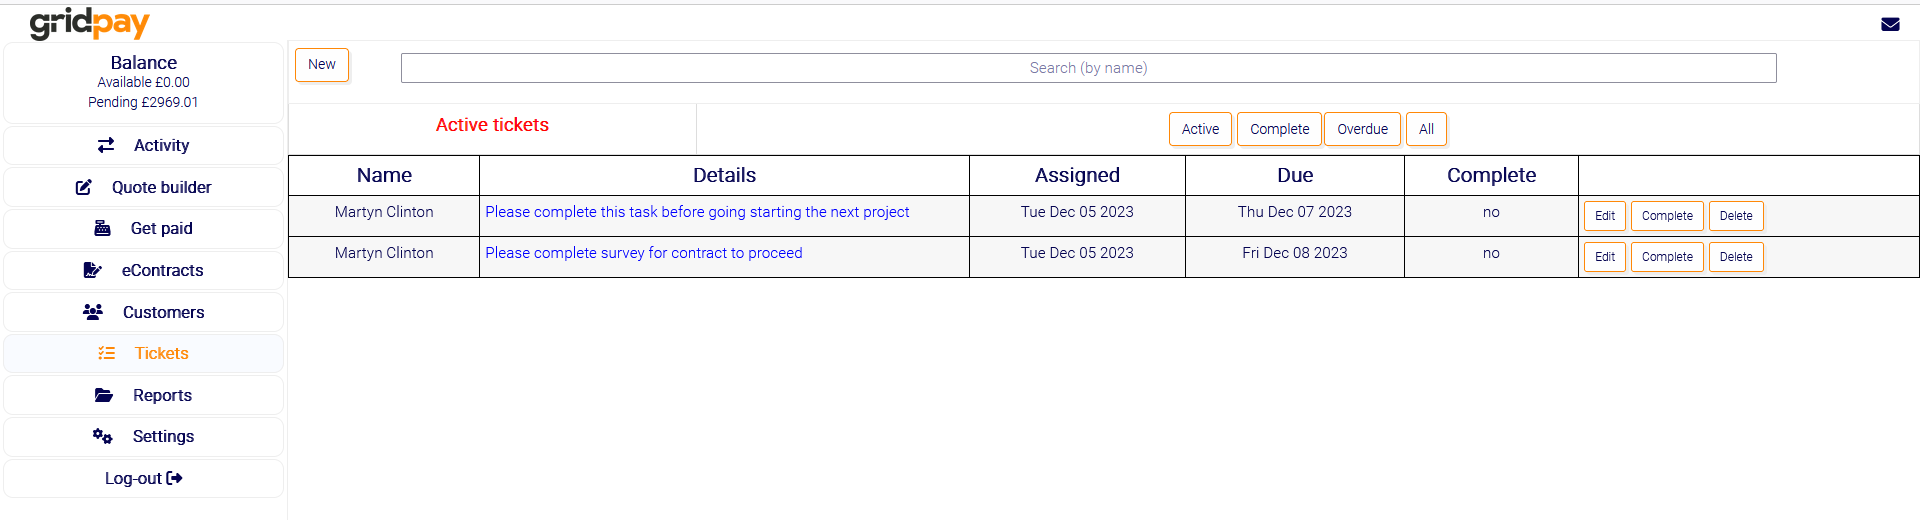
Gridpay Tickets allow you to set and keep track of tasks you assign your staff. You and your staff will be alerted if their ticket becomes overdue. Tickets can either be assigned directly through the ticket manager or through an eContract (see eContract section for more details). To use this feature correctly you must first add your staff in the settings menu under the business section. When you add in your staff you have 2 access levels to choose from. Basic gives them access only to their own tasks, manager gives them access to the entire eContract (if the ticket was issued via an eContract) and access to chat directly with the customer.
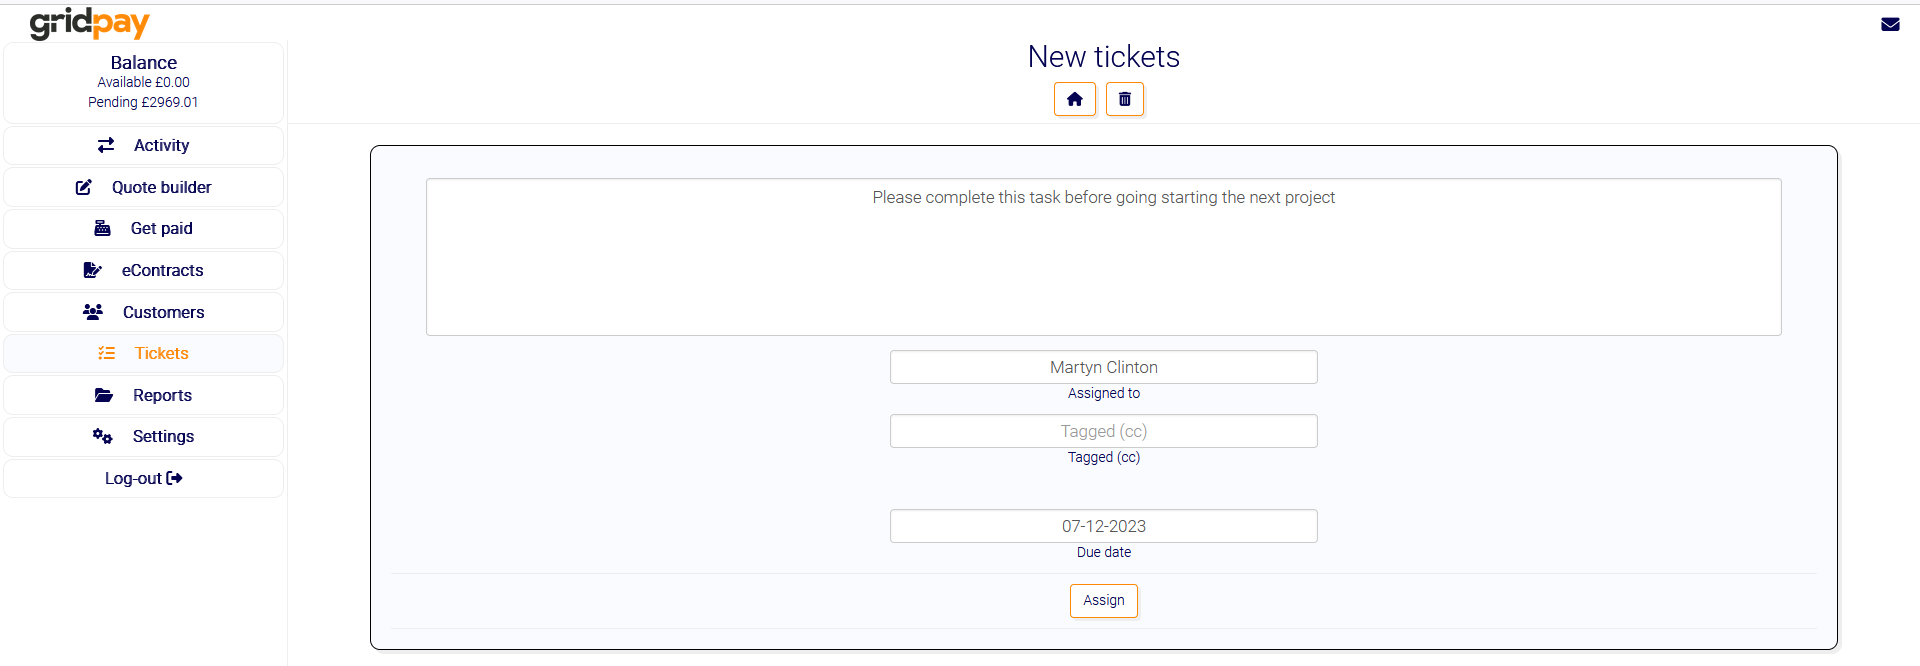
To set a new task, click on tasks then click new near the top left of the screen. Type in the details of the task. To assign the ticket to a person just start typing their name then select the correct person from the list that appears. Set a due date then click assign. The person you have assigned the ticket to gets an email alerting them of their new task.
The staff member can access their ticket manager anytime by clicking on the link in the email they received. Here they can view tasks, due dates and mark them as complete when necessary. You can switch between folders (All, Complete, Overdue and Active) by using the buttons at the top. If the yes/no under complete is blue in colour (manager level, eContracts only), you can link directly to that eContract and also chat with the customer.